Showing posts with label Chinese. Show all posts

Thursday, 9 June 2016

Chongqing Hot and Sour Noodles

I've been continuing on my exploration of Asian cookery. Recently I have been cooking a lot more noodle soups, being inspired by reading about David Chang’s ramen restaurant in his Momafuku cookbook. I think I have been put off in the past of making them- even though I order them a lot when I eat out- because of the stock making process. I have a small freezer which limits me from making huge batches of stock which I can use when I need. But as of late, I have managed to get into a happy rhythm of buy chicken, debone, cook meat, make stock from bones, soup... which basically makes up meals for most of a week. I have yet to make David Chang’s ramen, but I have had fun improvising and making dishes I like without a recipe, and trying out other recipes such as this hot and sour noodle soup. (Recipe from, yet again- Sunflower Food Galore)

This recipe has several different elements you make, and assemble at the last minute, but it isn’t difficult. I really like the noodles for it, made from sweet potato starch. They don’t taste of sweet potato, but they have a really satisfying texture- very soft and slippery, but not at all mushy. I was pleased to find them in my local Asian grocers, as well as this dish, I have seen them used in various Korean recipes that I have been meaning to try. The chilli sauce that goes with it is pretty great too, I would consider making it up in a large batch and so I  can get a quick spicy/sour hit on food when I want it. I didn't make my own chilli oil for the base of the sauce, as suggested in the recipe, but I had a lot of chilli oil at home that I really like so it seemed a bit much to make another kind for this.  


This dish is a really satisfying, sinus-clearing bowl of deliciousness. I think better for winter perhaps, but I wouldn't turn it down anytime of year.


Saturday, 24 October 2015

Pearl Meatballs

I have decided to do a little run of recipes with interesting names. I had intended to start off by remaking ants climbing the tree, but whilst looking at recipes, I got distracted by pearl meatballs- a Cantonese dim sum of minced pork studded with chopped prawn and water chestnuts, and rolled in sticky rice. The whiteness of the rice gives it its name.

For dim sum, these are not too fiddly to make at all. The meatball mix is a little wetter than the European meatball mixes that I am more used to handling, but not unworkably so. I would suggest using a pair of forks to roll the meatballs in the rice when you are coating them- it saves your fingers from getting glued up with pork meat and rice. Another tip I found when making these is to get the rice properly dry, after soaking and draining, I put it in the oven on a very low temperature for a few minutes.

They are pretty easy to make and very delicious- between three of us we managed to finish the whole batch.

The recipe I used was from Sunflower Food Galore, a seemingly endless source of recipe inspiration for me.


Pre-steaming
After steaming

Finished meatballs


Tuesday, 10 March 2015

Fish Fragrant Aubergine

This recipe has reignited my love of aubergines- I often eat them and find them very unappealing, with a strange woolly texture and tough skin. In this recipe, they are fried in lots of oil, and get a soft/silky texture. I also chose to remove peel them, so avoiding the possibility of difficult to eat skin, although this wasn’t specified in the original recipe.

Perhaps confusingly, ‘fish fragrant’ does not mean the recipe contains any fish- it just refers to a style of cooking involving ginger, garlic, spring onions, soy, and chilli bean paste. The result is quite hot, and very satisfying- very good if you have a cold too. You can cook other ingredients in a similar style, but my favourite is definitely this aubergine and pork mince combination. I’d like to cook prawns with these flavourings, although I am not sure how authentic cooking seafood or fish in this manner is.  
If you are hesitant about cooking with aubergines, I would recommend this- this recipe has jumped into my top ten dishes.
You might have to go to a Chinese supermarket for the chilli bean paste, and almost definitely for the Chinkiang black vinegar. I think it is worth it though, especially for the chilli bean paste, which is fast becoming one of my favourite store cupboard ingredients, for stir fries, stews, or anything I feel needs a kick.


The recipe I used can be found here- another recipe from Sunflower Food Galore. I chose to deep fry the aubergine, and also to peel it. I also made 1 1/2 times as much, for 4 as a main dish with rice- there was enough, but not enough for seconds- I think I would probably double the recipe next time for the same amount of people.

Wednesday, 10 July 2013

Red Cooked Pork

Served with steamed rice and pak choi, to cut through the richness of the fatty pork belly
Red cooking is what you would expect- the cooking process (a slow braise) imparts a red colour to your chosen meat. The flavour is rich, slightly sweet and deep. This is a variant of another recipe from Sunflower's blog- I have used other recipes, but this is my favourite. This time I made it, I did not use potatoes, which are used as a thickening agent as well as an extra comforting carb. I rather like drowning my rice in the thinner liquid, but you may feel differently- if so you can refer to Sunflowers instruction. I also cooked it for a lot longer than suggested, about 2 hours longer. For this reason, I use a casserole, and not a wok. The meat holds together, but barely, and the skin and fat from the pork belly is a soft, gelatinous treat.

You may need a trip to your local Chinatown for the fermented red beancurd and anything else, but nothing on the list of ingredients should be hard to find.

*Update 14/10/15*
This is still a fairly regular meal I make. I haven't changed anything I do cooking-wise, but I would like to recommend having some good chilli oil to hand when eating this.
I cooked this last night- here are some new photos:


Ingredients

2 tbsp oil
About 400g belly pork, cut into small chunks
1 rounded tbsp of red fermented beancurd, mashed
2 tbsp of the red pickling juice from the fermented beancurd
4 cloves garlic, chopped
2 - 3 slices ginger
1 tsp five spice powder
3 tbsp Chinese cooking wine
2 star anise
1 tbsp light soy
1 tbsp dark soy or mushroom soy
3 tsp sugar
some ground pepper

Method
Heat the oil to a high heat in a casserole, and stir fry the ginger and garlic until fragrant. Add the beancurd with some liquid from the jar, five spice and star anise, cook for a few seconds, then add the pork. Continue to stir fry for a few minutes, then add the wine, soy sauces and sugar, plus enough water to cover the pork. Bring the pan to the boil, and then reduce to a low heat.
Cook for about 2 hours on a very low simmer, until the meat is extremely soft.
Serve with rice.

Friday, 23 November 2012

Ants Climbing the Tree


I certainly wouldn't say the best thing about this dish is its strange name, but it rather cute. You have a pile of glass noodles (branches), mixed with spicy minced pork (the ants) and garnished with spring onion (the leaves). It's incredibly morish and very quick to boot. I used up the last of my chilli bean paste for this dish, which I was so keen to use up before I leave Australia. It has since become one of my favourite ingredients, and I am considering buying just one more jar so I can make this dish again. 

There are so many different slightly different recipes to choose from when making this. As per usual, I defaulted to using Sunflower's Food Galore blog. The first time I made this dish I used about 1 and a half time the amount of meat, also upping the mince flavouring ingredients, because it needed using. After having tried it both ways, I think I prefer the version with less meat- it feels more balanced. 


*Update- 26/10/15- I made  this recipe after not having made it for a while, and have updated this post with a nicer photo than before.

Ingredients 

100g dried glass noodles/cellophane noodles/ mung bean noodles (all the same thing, but it can be labelled under different names)
2 - 3 tbsp cooking oil2 - 3 cloves garlic, chopped1 tbsp of chopped ginger2 tbsp chilli bean sauce/paste, more or less to your taste 120 - 150 g minced pork1/2 - 1 tbsp light soy sauce1 - 2 tsp sugar (optional)1 stick of celery cut into very fine strips 1 chilli, deseeded and chopped 
180ml cup chicken or pork stock or water 2 stalks of spring onions


Method

Soak the noodles in warm water until soft, about 15 minutes, and then drain. Heat the oil in a wok or large frying pan, and stir fry the ginger and garlic for a few seconds until fragrant, and then add the chilli bean paste. Cook for a few more seconds, stirring the whole time, and then add the pork mince. Continue to stir fry the mix, breaking up the pork mince as best you can. Season with the sugar and soy,and add the chilli. Stir in the celery and cook for about 30 seconds more. Mix in the noodles, and pour the stock/water into the pan. Give it a quick stir, and leave to cook on a high heat until all the liquid is absorbed. Serve straight away with the chopped spring onion sprinkled on top.

Monday, 12 November 2012

Fried Chicken Buns


Finished buns


I do feel more than a little bit of shame that I am posting another recipe that originates from Sunflower Food Galore, but I've had a week where I cooked almost exclusively using recipes from that blog. Hopefully she is of the belief that imitation is the sincerest form of flattery.

I can't ape a dim sum restaurant at home, as there are usually only two eaters and just making a batch of one type will make more than we can eat. If I want the full experience of trying lots of delicious morsels, I do have to eat out. However, I do enjoy the process of making them, especially when I am in the mood for pottering around in the kitchen.

These chicken buns are half fried, half steamed, so you get a golden crispy base, but with a steamed top and filling. We couldn't eat all of them in one sitting; there is something very heavy about dim sum.  I set aside half of the buns, clingfilmed in the fridge, prior to cooking, and had them the following day-they didn't seem to suffer any ill effects from hanging round. Although I would recommend either taking them out of the fridge about an hour before you want to cook them, or cooking on a lower heat than usual, as the chicken filling will take longer to cook if it starts off fridge-cold.


Condiments of choice
Before sealing
Buns before cooking


For the dough:
200g white bread flour
100g plain flour
2 tbsp sugar
¾ tsp of salt
¾ tsp of quick acting yeast
2 tbsp of cooking oil

160 – 175 ml of water
For the filling:
350g chicken breast cut into small pieces (I used thigh as I am not keen on breast)
1 ½ tbsp of grated ginger
2 tbsp light soy
1 ½ tbsp of Shaoshing wine
Pinch of salt
Pinch of pepper
2 – 3 tsp of sesame oil
1 heap tsp of cornflour
2 stalks of spring onion, chopped
Few sprigs of coriander, chopped
Small handful of bamboo shoots (optional), cut into small piece (I left these out)
Few woodears, soaked and cut into fine strips – optional (I left these out)
some water and little oil for cooking

Method

Start with the bread dough: mix the dry ingredients together and add the oil. Gradually add stir in the water to make a soft dough. Knead for five minutes until smooth and elastic. Set the dough aside for an hour to rise.

During the dough's rising, mix all the filling ingredients together.


When the hour is up, tip the dough onto a floured surface and knead briefly. Leave for a few minutes to relax, then divide the dough into 12 equally sized pieces. Take one of the pieces of dough and roll into a ball. Stretch or roll the ball into a 8cm circle. Put a lump of filling in the centre of the circle, and bring the edges together to seal. Dust the bottom of the bun lightly in flour, and set aside to rise. Repeat with the rest of the dough.

Heat a little oil over a medium-low heat in a frying pan that has a lid. Cook the buns in batches- carefully transfer them to the pan, and cook covered for 1-2 minutes. Check one of the buns, and if the base is pale golden, the drizzle 4 tablespoons of water around the buns and replace them lid. Leave to steam for another 2 minutes, once the water has evaporated add another 2 tablespoons of water and cook for about another four minutes. All the water should be evaporated.
Serve immediately.

Wednesday, 7 November 2012

Chengdu Chicken/ Chen du ze jee


This is yet another one of my favourites from Sunflower Food Galore. Szechuan food is often described as 'hot and numbing', this chicken dish certainly is. It is also fragrant, from the dried orange peel. Szechuan peppercorns cause a slight numbing sensation to the mouth, hence the 'numbing' title.

I haven't really touched the recipe, except when I made it the second time I used the liquid from soaking the orange peel in the recipe.

I think this makes an excellent winter dish, especially if you are tired of eating the usual  heavy casseroles and stodge to warm you up.

Ingredients
500g chicken
2 - 3 tbsp of cooking oil
2 tbsp of chilli bean paste
1 small thumb of ginger
1 small piece of chinese dried mandarin/tangerine peel
1 tbsp of Szechuan peppercorn (whole)
1/2 - 2 tsp of crushed chilli flakes
2 - 3 tsp of chinese black rice vinegar (Chinkiang vinegar)
1 - 2 tbsp Chinese cooking wine
2 tsp sugar
1 heaped tsp of cornflour
 To garnish
1/2 tsp ground Sichuan pepper
2 stalks of spring onion, finely chopped to garnish

Method
Soak the orange peel in some warm water for about 20 minutes until softened. Meanwhile, peel and finely chop or grate the the ginger. Cut the orange peel into very thin shreds, I find it easiest to use a pair of scissors.
Cut the chicken into small pieces.
Heat the oil in a wok or large frying pan. When the oil is hot, add the whole Szechuan peppercorns, and fry for a few minutes until the oil is fragrant. Remove the peppercorns and discard. Add the chicken and chilli flakes, and stir fry until the chicken is golden brown. Add in the ginger, orange peel and chilli bean paste. Cook for two more minutes, and then add the vinegar, wine and sugar. Meanwhile, slake the cornflour in a little water (mix together to make a thin paste).
 Add some water- how much depends on whether or not you like a saucy or dry dish. I like to use the orange peel soaking liquid. Add the cornflour paste, and stir until it the sauce has thickened.
Transfer to a serving dish, and sprinkle over the spring onions and ground peppercorns

Saturday, 20 October 2012

Gan Ban Niu Rou Si- Szechuan Dry-Fried Beef


Another Szechuan beef recipe with similar ingredients to this slow cooked recipe, but with a very different end result. Now I have stocked up on dried orange peel, chilli bean sauce and star anise, I need to find recipes to use them in. While I am fairly confident in making my own way in cooking European food without always referring to cookery books, I need the support of a recipe for South-East Asian food. As is normal for me, I turned to Sunflower's Food Galore for inspiration, and as usual, this blog did not disappoint. 

I have had a run of making recipes from Sunflower's blog over the past week, and this spicy beef dish was the first. I loved it, and I will definitely be making it again soon. I was also very happy with how it looked- without effort it looks attractive too.

In a previous post I mentioned I don't own a wok, as living abroad restricts my kitchen utensil buying. I made this in a big casserole. It worked, but its not ideal. Not for the actual eating, but for making it. The recipe requires you to remove hot oil during cooking, and this would have been a lot easier in a light wok with sloping sides, rather than a cast iron pan with very hot handles. So I have written this recipe as if I have used a wok, because I would certainly not recommend my method!

Ingredients:
500g lean beef steak (rump or sirloin) I used rump
2 sticks of celery
a small handful celery tender leaves, roughly cut
1 small or half large red sweet pepper
1 thumb size ginger, peeled 
2 - 4 large dried chillies
1 tbsp sichuan peppercorns
1 rounded tbsp chilli bean sauce 
about 1.5 tbsp Chinese cooking wine
dash of light soy to taste
0.5 tsp sugar
pinch of ground Szehuan pepper

 6 - 7 tbsp cooking oil


Method:

Remove any gristle from the beef, and cut into long, thin strips. Deseed the pepper, and cut into thin strips. Slice the ginger into thin strips too, and cut the ginger into matchsticks. Cut the dried chillies into chunks and de-seed them. I found this easiest to break them up with my fingers, and tap them on the chopping board to remove the seeds.

Heat the oil in a wok, and fry the whole Szechaun peppercorns and dried chillies. Remove once the chillies have turned very dark, almost black. Reserve the chillies for later, and if you like, the peppercorns. If you don't want to be crunching on them, discard.


Turn the heat to its highest setting, and add the beef to the oil, spreading it out in the pan. Do not stir. The oil will bubble up and become cloudy, and eventually settle down and become clear again. Once this has happened, stir the beef until it has browned and crisped very slightly. Push the meat to one side of the pan, and turn the heat down low. Remove all but 1 teaspoon of the oil.

Turn the heat back up to a high temperature, and add in the ginger and chilli bean sauce. Stir fry briefly, and then mix the beef into these flavourings. Add in the reserved chillies from frying previously.

Add the celery and rep pepper, and stir fry until softened to your liking. Off the heat, stir in the celery leaves, and season with light soy, sugar and the ground Szechuan peppercorns.

Monday, 15 October 2012

Szechuan Beef Claypot

I recently tried Szechuan Beef claypot at Festive Kitchen, one of the many Chinese Restaurants on William Street in Perth. It almost reached my heat tolerance, but not quite, and was addictively delicious- hence my attempt at recreating it at home.

Festive Kitchen has mostly good reviews on Urban Spoon- I like it a lot. I noticed a few negative comments regarding the service, however from both my visits, I found the staff to be very friendly and efficient. As well as this beef dish, I can recommend the soft shell crab, which comes crispy and with an incredibly liberal sprinkling of garlic, chilli and spring onion, and the deep-fried pork leg, which has a gloriously gelatinous half meat half fat quality.
The restaurant itself is a little more expensive than the noodle bars that Festive Kitchen neighbours, but for a treat it's worth a visit.

I found a recipe that looked similar to the dish we had eaten on the blog Yi Reservation. Despite a plethora of Chinese supermarkets nearby, I couldn't find anything labelled Sichuan Chilli Bean Paste, but I did find Sichuan Chilli Bean Sauce (Lee Kum Kee brand), so I bought this and hoped for the best. I also added a little extra than suggested on Yi Reservation, as sauce suggests more dilution than paste. I also left out the radish/potatoes, as the version I had at Festive Kitchen was starchless.

I don't own a wok, and because I am leaving the country in 6 weeks, do not want to buy any kitchen equipment. So instead of frying the flavourings and meat in a wok and then transferring to a casserole, I did all the cooking in the casserole. I have written the recipe out using this method, but for the original way, see the link to Yi Reservation above.

I was very pleased with the result- when I make it next time (and there will be a next time), I will probably add a few extra dried chillies. I stirred in a little extra chilli bean sauce mid cooking to heat it up, but it is also quite salty so I think extra chilli from the start would have been a better solution.
Dried spices


Ingredients
1-1.5kg beef- something suitable for casseroling
2 tbsp groundnut, vegetable or sunflower oil
5 cloves garlic, peeled and whole
2 inch ginger
2 tbsp Sichuan chili bean paste/cauce
2 tbsp soy sauce
2 small rock sugar, or brown sugar
4 tbsp Chinese cooking wine.
1 lite water or beef stock
4 star anise
6 dried chillies
1 tsp Sichuan peppercorn
1 stick cinnamon
1 tsp fennel seeds
2 cloves
1 piece dried orange peel
4 bay leaves
2 black cardamom pods

Chopped spring onion, to serve

Method
Cut the beef into 2-3cm chunks. Blanch in boiling water, and then refresh in cold water. Drain and set aside.
Heat the oil in a casserole, and gently fry the garlic, ginger and chilli bean sauce for about 3 minutes over a low heat. Add the beef to to casserole, and stir to coat in the sauce. Add the soy sauce, sugar and wine, and cook for another two minutes. Add the spices and stock. Bring the pan to a simmer, and then turn the heat down to low, and cook until the beef is tender (1-2 hours).
Sprinkle over the chopped spring onion before serving with rice.

If you have leftovers, you can also turn it into spicy beef noodle soup, simply by adding some freshly cooked noodles to the broth.

Tuesday, 29 November 2011

Salt and Pepper Ribs

More delicious Chinese treats courtesy of Sunflower of Sunflower's Food Galore. If you are used to your ribs in a thick BBQ goo, try these. Sauceless, they are crispier and meatier, you just might want a little chilli sauce on the side for lubrication. I couldn't get ribs cut into short lengths, but if you can get your butcher to cut the ribs into halfs across the bone, or want to have a go with a meat cleaver yourself, your result will be more similar to the size Chinese restaurant ribs. This recipe involves deep frying, which can be a  good or bad thing depending on who you are. For me, this is an excellent thing, which is why I include them here.

Ingredients
3 tsp Sczechwan peppercorns
1 tsp black peppercorns
4 tsp salt
1kg pork ribs, cut into individual pieces.
groundnut or vegetable oil, for deep frying (lots)
2 red chillies, deseeded and chopped
4 cloves garlic, peeled and finely chopped
4 spring onions, finely sliced

Method
Toast both types of peppercorns in a dry frying pan until they release their scent. Crush finely with a pestle and mortar, and stir in the salt. Rub the ribs with the mixture (you won't need it all) and leave for about an hour out of the fridge. The remaining spice mixture can be kept for a few weeks in a tupperware box or similar.

When you are ready to eat. heat the oil in a saucepan. Deep fry in batches until browned and crispy, removing from the pan with a slotted spoon, blotting with kitchen roll to remove excess oil. Keep the cooked ribs warm in a low oven while you cook the rest.

Heat some oil in a frying pan and wok, and stir fry the chilli, garlic and spring onion. When just cooked and aromatic, sprinkle over the ribs, and eat.

Saturday, 20 August 2011

Spring Onion Pancakes/Chong Yao Beng


Despite a banal ingredients list, spring onion pancakes are great when done right- soft and crisp, hot and oily, similar to paratha. Restaurants serving dim sum will normally have them on the menu. They are really cheap and easy to make at home too, where you have the benefit of being able to eat them at their peak, straight out of the pan.

The pancakes could be made as an addition to a larger Chinese meal, or as a snack served with condiments alongside. I like chilli oil, toasted sesame oil or sometimes just on their own, sprinkled with some flaky sea salt. In this instance, I made them to go alongside the sweet potato soup, which I know is lacking in any authenticity whatsoever. But I was cooking for myself, so was not tied by such constraints, or felt obliged to explain the pairing to any would-be food critics. The important thing was that they went nicely, as I thought they might.

Ingredients- makes 4
150g plain flour
125ml water
salt
4 spring onions, finely chopped
4 tbsp flavourless oil- vegetable, sunflower or groundnut 

Method
Put the flour in a bowl with a pinch of salt, mix in the water to make a dough. You may need a little more flour to make it less sticky, but it should be very soft. Divide into 4 pieces.
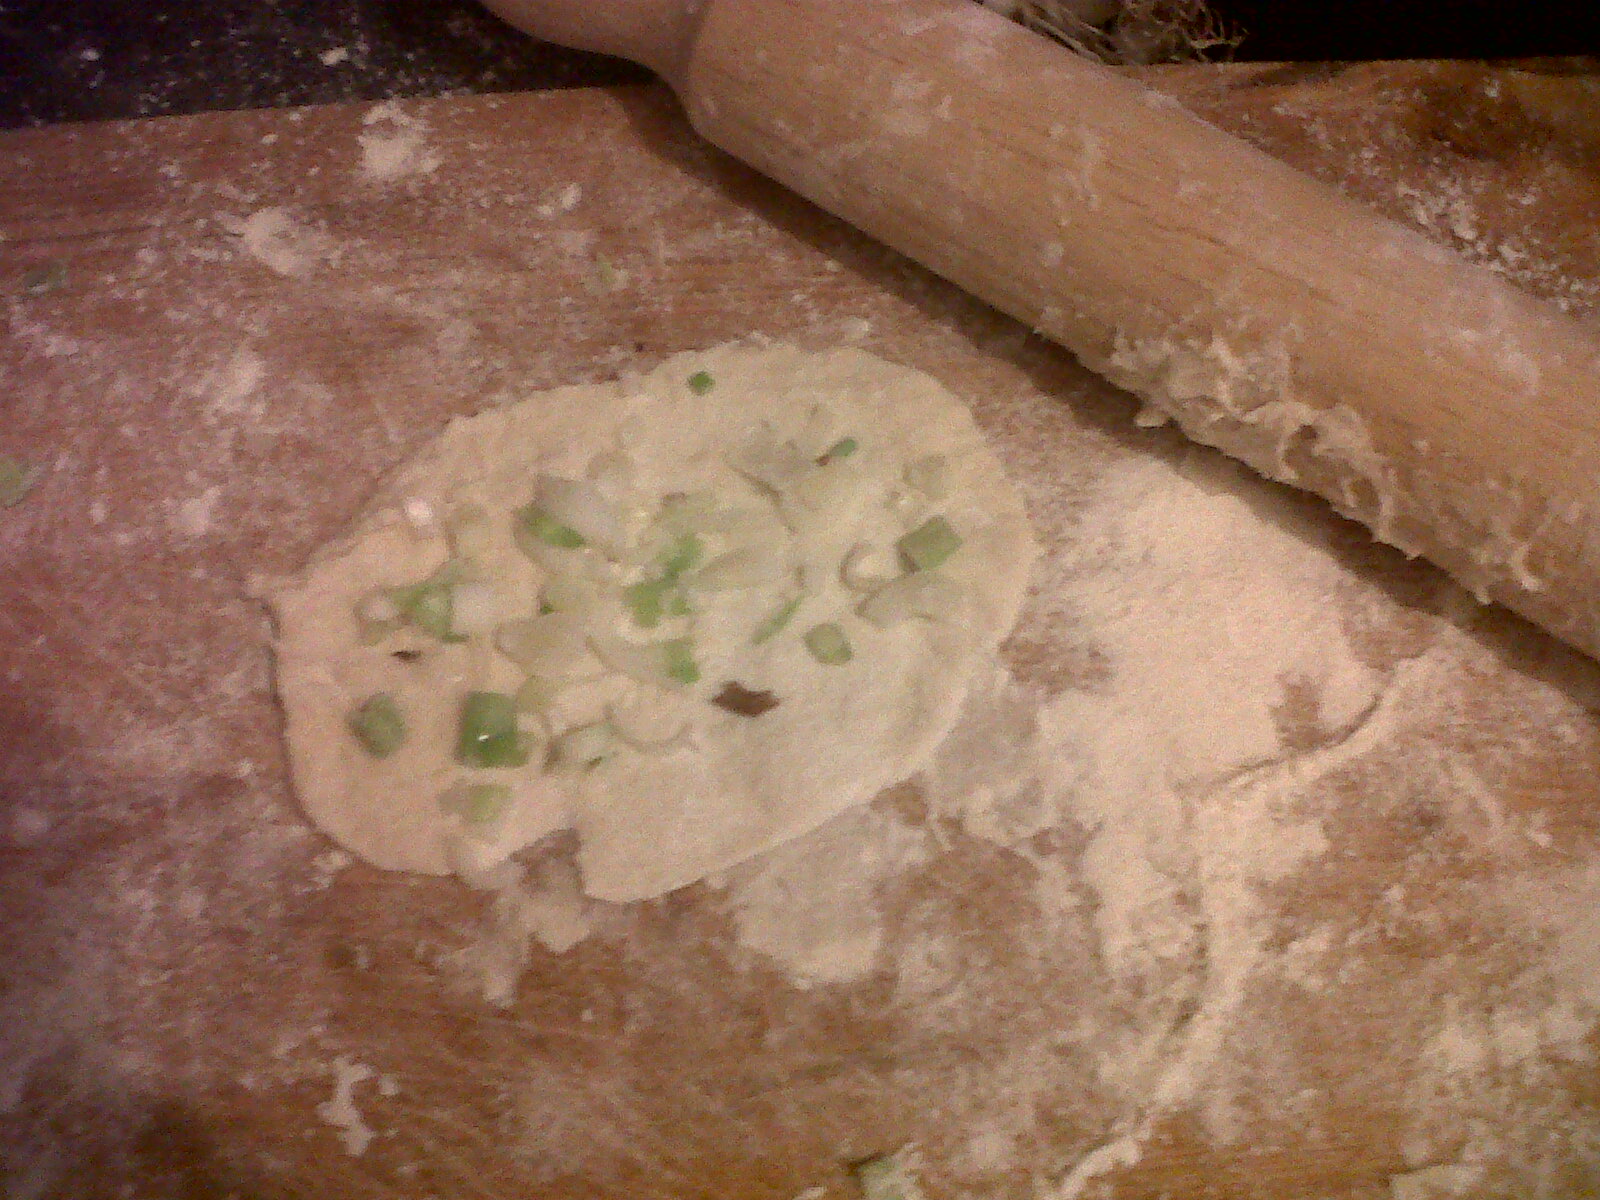
Flour a board and rolling pin. Roll out one of the dough balls as thinly as you can into a rough circle. Sprinkle over a quarter of the chopped spring onion with a small pinch of salt. Roll up like a sausage, and then roll this into a snail. Flatten the snail with your hand to push the coils altogether, reshape a little with your hands to make a circle. I made them about 10cm in diameter. Repeat with the remaining three pieces of dough.

Heat the oil over a medium heat in a frying pan. Put in the uncooked pancakes, and fry on each side until golden brown and crispy on the outside and chewy in the middle.