Showing posts with label Meat. Show all posts

Friday, 6 November 2015

Weeping Tiger (Suea Rong Hai)

Weeping Tiger is one of my favourite things to order at a Thai restaurant, but I recently found that it is very simple to prepare at home. It is just steak, marinated (what it is marinaded in seems to vary from recipe to recipe), grilled, sliced and served with jaew, a hot and sour dipping sauce.

Why the name? I couldn't find a clear answer, there are various suggestions for the name's origins- one is that the sauce is so hot it made the tiger cry, another is that it used to be made with eat so tough even a tiger couldn't chew it- hence the tears. It certainly doesn't seem to be made with tough meat now- most recipes suggest sirloin or rib eye.

As I said, it is a very simple recipe. The one bit that might seem a bit odd is making the toasted ground rice to go in the dipping sauce, but it isn't hard- just toast some uncooked jasmine rice in a dry frying pan over a low heat until golden, then grind to a powder. It keeps, so you could make enough for several batches of jaew. Which is certainly now a bad idea, jaew is really good with prawns and chicken too.


The recipe I used came from Serious Eats. I didn't cook this over coals, as the recipe suggested, I used my trusty cast-iron griddle pan.

You can find the recipe on the link above, but the sauce and steak recipe are on separate pages, which makes it a bit tricky to read- so I have copied the two parts of the recipe here, for ease.

For the steak:
  • 4 rib eye or New York strip steaks, about 1 1/2-inches thick (about 12 ounces each)
  • 2 tablespoons dark soy sauce
  • 1 tablespoon oyster sauce
  • 1 tablespoon light or dark brown sugar
  • 1 tablespoon plain vegetable oil

For the sauce (jaew)
  • 1/2 cup fresh juice from 6 to 10 limes
  • 1/2 cup Thai fish sauce
  • 1 teaspoon sugar
  • 2 tablespoons finely-chopped fresh cilantro leaves
  • 2 tablespoons finely-chopped green onions
  • Raw jasmine rice, to make 1 1/2 tablespoons toasted rice powder (recipe below) I used about half a cup raw rice, which made more than needed-but it keeps.
  • 1 tablespoon dried red pepper powder- I ground up some dried birds eye chillies to make this.
  • 2 plum tomatoes
Mix together the soy sauce, oyster sauce, brown sugar, and vegetable oil in a medium mixing bowl. Coat the steaks with the soy sauce mixture and let them marinate while you work on the dipping sauce.

To make the toasted rice powder, toast the raw rice in a dry frying pan over a low heat until the rice is golden. It's best to go slowly with this, so it cooks evenly and doesn't burn. Grind in a pestle and mortar to a powder.
Peel, deseed and finely chop the tomatoes, and put in a bowl. Mix with the rest of the jaew ingredient.

Grill the steaks, until desired doneness is reached. Remove from the heat and let rest for 5 minutes.

Cut the steaks into 1/4-inch slices and serve with the dipping sauce.


Monday, 2 February 2015

Jerk Gammon Hock and Jerk Ribs

I am lucky to live near a fantastic butcher, Aubrey Allen. The meat is fantastic, and they have possibly the most helpful staff I have ever encountered. I went in the other day for nothing in particular, and came out with a large gammon hock for less than £2. I didn't have any recipe in mind, but came across this jerk gammon hock recipe by Jamie Oliver. I was in the mood for something a bit more fiery than just cooking the hock in cider with root vegetables, which would have been my default cooking method for a gammon hock. It's been a while since I have cooked anything by Jamie Oliver, even though I have always enjoyed his recipes.

I had to change the a little- the recipe specified 4 500g ham hocks. Mine was certainly more than 500g, probably almost double that. I made all the marinade, but had about half of it left over. I also cooked it at a lower temperature, but for about the same time- it came out very tender on the inside, and a little blackened on the outside.

I didn't eat it right away, I let it cool and then shredded it up, coating it in a little clementine juice and olive oil, as per the recipe's instructions. The next day, I fried the ham in a hot frying pan, with a little extra olive oil and a squeeze more juice added at the end of cooking. It turns it sticky and slightly crispy- delicious. To eat alongside, I made some coconut rice, with spring onions and lots of freshly chopped coriander stirred in at the end.

I had half of the marinade left, so I used it on some pork ribs, from the aforementioned Aubrey Allen. They weren't like baby back ribs, which is what I was expecting, but far thicker, more like a slab of pork belly:


I cooked them for about an hour at 170 degrees Celsius, and then turned the heat up to 220 and cooked for a further 15 minutes to crisp up the fat.

Thursday, 6 November 2014

Osso Buco

Until last week, I had never tried the classic Milanese dish, osso buco, let alone made it myself. It's something I have been intent on cooking for some time, but the main ingredient, thick slices of veal shin, have eluded me. I have never been interested in making a variation on with a substitute for the veal, such as pork- I wanted to try the real thing. My butcher had osso buco in stock the other week- this is not a regular occurrence, so I took the opportunity to buy what I could.

I mentioned wanting to try the real thing- osso buco is one of those dishes that has a lot of dispute on how to cook it the correct way- namely, whether or not tomatoes should be added to the dish. I am not an experienced enough cook to join in on this debate, so I went with the advice of Anna Del Conte, who is both Milanese and author of some of my favourite cookery books. She is very clear on her opinion that tomatoes should not be added to osso buco. I wouldn't rule out trying it, as I would like to be able to form my own opinion on the great tomato debate, but veal is a bit too expensive for me to buy often enough to experiment.

I served the osso buco with the it's classic pairing, risotto alla Milanese. The recipe I used suggested using some beef marrow into the risotto, which I sadly do not have a ready supply of- I used the listed substitution of pancetta. The big slices of veal I had, did hold a lot of wonderful, creamy marrow, which was a real treat, especially with a sprinkling of sea salt on it- so I didn't feel I was missing out by not using marrow in the risotto too.

The recipe I used is here. I only had 4 slices of osso buco, but I kept the other ingredients in the same quantities. It meant I had a lot of leftover cooking liquid, but it was so delicately delicious that the remaining juices got eaten the next day with just some bread to soak it up.


Monday, 27 October 2014

Slow Cooked Beef Short Ribs with Chorizo and Borlotti Beans

I came up with this recipe last week, when I was craving something warming, but wanted to avoid the stodginess that winter food can often have. I used some flavourings that I associate more with late summer, such as orange, chilli and fennel, which lifted the dish from potential blandness.

The butcher near me had beef short ribs on offer, but any cut suitable for slow cooking would work. I enjoyed cooking with them though, using a bone-in cut meant the dish had a real body to it.

 For the beans, I had been given some home-grown borlotti beans, so I used them, but they don't have to be borlotti beans, and they certainly don't have to be fresh- dried or tinned would work fine too. If you are using dried, soak and cook them separately first. For tinned beans, I would add them to the dish about 1 hour before it is ready, so they don't disintegrate into the cooking liquid.

We just ate this with lots of bread and butter.

750g-1kg beef short ribs
200g chorizo- I used a pack of Brindisa mini chorizos
200ml red wine
1-2 tbsp plain flour
Beef stock, to cover- approx 500ml
1 tin chopped tomatoes
1 large carrot, peeled and diced
1 stick celery, diced
2 red onions, peeled and sliced
1 bay leaf
approx 6 cloves garlic, peeled but left whole
small bunch thyme leaves
sprig rosemary
Juice of 1 small orange, plus a strip of zest (ideally use an unwaxed orange)
1-2 dried chillis
1 tsp smoked paprika
1 tsp fennel seeds
1 handful fresh/ dried, soaked and cooked borlotti beans (or one tin)

Roughly chop the chorizo into chunks, or, if you happen to be using the same type as I did, just cut them into individual sausages. Brown the chorizo in a heavy bottomed saucepan. Remove with a slotted spoon to a casserole dish, leaving behind the paprika-y oil. Put the flour on a plate, and season, then lightly coat the beef ribs with the seasoned flour. Brown in the same pan used to cook the chorizo, over a high heat, so the surface gets nicely caramelized. Whilst this is cooking, add all the other ingredients to the casserole dish except for the beef stock, and stir to combine. Add the beef once full browned, and add enough beef stock to cover. Bring to a simmer on the hob, then turn the heat down, cover, and cook for approximately 3 hours, or until the beef is very tender. I chose to remove the rib bones from the beef, cut it into chunks, and stir it back into the stew before serving.


Friday, 17 October 2014

Roast Pork Belly with Quince


I get a bit overexcited when I see quince in the greengrocer- they are one of the few things that you can't get all year round, so I like to make sure I buy them when I can. Some end up flavouring vodka, and some for pudding- last year I poached quinces in mulled wine and honey, with pleasing results. I've also used grated quince as instead of apple in mincemeat, which was nice but not necessarily better. I'm most interested in using them in savoury dishes, either to add needed sweetness to things like tajines, or as a foil to something fatty, like duck or pork belly. I had seen a recipe a while ago that had stuck in my head for roast pork belly with quince. I couldn't find the original recipe, or remember everything that went in it, so this is my spin on it. I loved the results- fatty, sticky pork belly with sour, fragrant quince.

1 piece pork belly, skin scored
2 quinces
3 onions
2-3 cloves garlic
½- 1 teaspoon fennel seeds
About 1 tbsp thyme leaves
Sea salt and freshly ground black pepper
A little olive oil

Preheat the oven to 200 degrees. Peel the garlic cloves, and put in a pestle and morter with the thyme leaves, and pound to a paste. Add the fennel seeds, and lightly crush. Add a little olive oil to loosen the consistency, and some salt and pepper. Rub all over the sides and bottom of the pork belly- don’t put any of the garlic paste on the skin, but do give it a good sprinkling of sea salt.  Place the pork in a roasting tray. With a sharp, heavy knife, cut the quince into slim segments, cutting out any core/pips you get on your slices. Peel and slice the onions, and scatter around the pork belly with the quince. Lightly slick the onion and quince slices with some olive oil, and season. Roast for 25 minutes, then turn the heat down to 160 degrees and roast for another 1 and half-2 hours. Turn the heat up towards the end of cooking time if the skin is not completely crispy and blistered.

Leave the meat to rest under some foil for at least 10 minutes before serving.


I deglazed the roasting tin with some dry cider for a quick gravy, and ate with some mashed potato, and just-tender kale with chestnuts and lardons.


Sunday, 13 April 2014

Lamb Noisettes with Feta, Chilli, Thyme and Lemon Zest (plus some sides)

This is a fancier dish than my usual style; for a start I tend to hand my guests a plate and get them to serve themselves rather than me prettily plating it up for them. Sometimes the meal suits this kind of treatment, and I am happy to do it on occasion. In this instance I had bought some very nice lamb noisettes, and I wanted to make more of an event of the meal. The pan juices on the plate does look quite messy, but never mind- I have never pretended that presentation is one of my strong points.


The photo above shows all the components- the lamb noisettes topped with a mix of feta, chilli, lemon zest and thyme, sweet potato mash and roast cherry tomatoes with whole garlic cloves and coriander seeds. I was really pleased with the combination of flavours, everything complimented each other wonderfully.


For the whole meal I used 10 noisettes  for 3 people (3 each, plus one left to fight over). I went about it as follows:

Flavourings
Mixing together some roughly chopped/crumbled feta (about 100g), a finely chopped and deseeded medium heat red chilli, the zest of one lemon, and about a tablespoon of finely chopped thyme leaves. I then added a scant teaspoon of lemon juice, and a drizzle of olive oil, just to lubricate it all. I added some freshly ground black pepper (no salt, as the cheese is salty enough). I set this aside while I got on with the sides.

Sweet Potato Mash
I peeled some sweet potatoes- I can't remember the exact quantity, 'enough for three' is the best description I can think of- and cut them into equal sizes. Put in a saucepan, bring to the boil and simmer until tender. When they are tender, mash with a good amount of butter, some sea salt and black pepper. Once the mash is done, it'll sit happily, covered with the saucepan lid, while you get on with the lamb.

Tomatoes
While the potatoes are boiling,put the oven onto 200°C. Put some (again, enough for three, or however many of you are eating) cherry/baby plum tomatoes in an oven proof dish. Lightly crush about a teaspoon of coriander seeds, add to the dish, along with some whole, unpeeled cloves of garlic. I like a lot of garlic, I used a whole,small head of garlic in this. Add black pepper and sea salt and drizzle over enough olive oil to lightly coat everything. Briefly mix it all together with your hands.  Roast for about 20 minutes, until the garlic is tender and the tomatoes are slightly blistered.

Lamb
Heat some olive oil over a medium-high heat in a large frying pan. Pat the lamb gently with some kitchen paper to remove any excess moisture. When the oil is hot, add the lamb noisettes, and cook for about 2 minutes a side- of course, how long you cook them for depends on to what degree of rareness/well-doneness you like lamb. Remove the lamb to the plates, and spoon over the feta mix (I actually get someone else to do this while I do the next step). Put the frying pan back on a low heat, and deglaze with some white wine- about half a glass. I found the juices tasted rather sour, so I recommend adding a little honey or sugar to the pan with the wine. When the harsh alcohol smell has disappeared,pour over the pain juices. Ideally, a helpful friend will have already put the sweet potato mash and the tomatoes on the plates. If not, sigh a martyed sigh, and do it yourself, and then serve.

Friday, 13 December 2013

Crispy Pata and Atacharang Papaya

I first had crispy pata about 6 years ago in a pub in Kenilworth, The Famous Virgins and Castle, which has a half English, half Filipino menu. For those who aren't aware of the delights of crispy pata, it is a deep fried pork hock. It should have a rich brown skin that snaps when you break it (like the savoury equivalent of the top of a crème brulee), and very tender flesh. It's rich, fatty, and the meat in almost gelatinous in place, and you'll need a lie down after eating.
The Famous Virgins and Castle serve the pork with rice and atcharang papaya. I only ever have a few mouthfuls of rice, or I fill up and can't eat all my pata, which would be a terrible thing indeed. Atacharang papaya is a pickle, made with unripe papaya. It is sweet and sharp and cuts through the fatty pork very well.
Crispy Pata has to be the most terrifying dish I have ever cooked. I don't think I'll be making it again without a deep fat fryer, and even then, I'm not sure it's worth the clean up and the terrifying noises of the pig skin blistering and popping. I'm glad I attempted it, but I think it'll be a dish that I'll order in restaurants rather than make at home.

Atacharang Papaya
You need to know if you want atacharang papaya a few days before you eat- it improves with a little time. Every recipe I looked at specified the importance of using green, unripe papaya. Luckily, that was all I could find in the supermarket anyway.

1 green, unripe papaya
1 tbsp salt
4 cups vinegar
4 cups sugar
5-10 shallots (the recipe I was using this a base for specified red shallots- I could only find regular ones, and used these)
1 red pepper
2 large red chillies
1 large carrot
1 cucumber
handful raisins
I head garlic
a few slices of ginger.


Peel, destone and finely shred the papaya. Place in a bowl, and sprinkle with the salt. Let it sit for a minute or two, then place in a sieve and rinse off. Squeeze the papaya to remove as much as the moisture as you can. Set aside. Shred the cucumber and carrot, the pepper and the chilli (removing seeds and pith from the last two). Peel and finely slice the shallots. Mix all these together in a bowl, with the papaya and the raisins.

Put the vinegar and sugar in a large sauce pan with the slices of ginger. Slice the head of garlic horizontally in half, and add this too. Dissolve the sugar over a low heat, and then boil for 3-5 minutes. Allow to cool for 10 minutes. I discarded the ginger slices, but peeled and separated the cloves of garlic and included them in the pickle.

Put the shredded vegetables in a large jar and pour over enough of the pickling liquid to cover. Leave for 2 days before using.


Crispy Pata
1 pork hock
6 bay leaves
2 tbsp whole black peppercorns
4-6 star anise
teaspoons salt
2 teaspoons freshly ground black pepper
2 to 3 teaspoons garlic powder
12 to 15 cups water
8 to 12 cups cooking oil

Bring the water to the boil in a pan large enough to take the meat later.
Add the bay leaves, whole peppercorn, star anise and 4 teaspoons of the salt along with the pork hock. Simmer the meat until it is tender. The recipe I used suggested 45-60 minutes, I ended up cooking it for more like 2 hours.

Remove the pork hock and set aside to cool.Rub the leg with the ground pepper, garlic powder and remaining salt. Let it sit for at least 15 minutes.

Heat the oil in a large cooking pot with a lid. Don't use a pot without a lid, it is far too messy, and more importantly, dangerous to leave this uncovered.

Gently put the pork in the oil (to avoid splashing). Cover, and leave top crisp up on one side, then turn and cook the other side. This takes far longer than you would expect. The skin needs to properly crackle and blister before it is ready. When the skin is well browned and crunchy, it is ready.

Serve with the atcharang papaya and some plain rice.


Monday, 16 September 2013

Harissa Roast Chicken


This is a very simple roast chicken recipe, which I made when I had a chicken in the fridge, but little inclination to go to the shops to buy flavourings. Luckily, I had a jar of Belazu Rose Harissa, which is a lovely product, something I buy when I take myself out to Waitrose as a treat. I served it with flatbread, roasted tomatoes and olives with feta and some garlicky yoghurt. If I had been to the shops, perhaps I would have got some mint for the yoghurt, or may even bought the ingredients for tabbouleh (which I think this would have gone especially nicely with the chicken). Even so, it was a great meal.

Ingredients
1 roasting chicken
2-3 tbsp rose harissa
enough olive oil to loosen the harissa- about 1 tablespoon

Preheat the oven to 200 degrees. Mix the harissa with the olive oil in a bowl. Gently loosen the skin of the chicken with your hands, and spread the harissa mix onto the breast of the chicken. Spread any leftover harissa over the legs, inside the chicken cavity, all over. Sprinkle the chicken with salt- something nice and flaky, for preference.
Roast the chicken for 20 minutes for every 500g, plus an extra half an hour. Let it rest for about 20 minutes before carving and serving.

I made a little sauce to go with this- just the chicken juices scrapes up from the bottom of the pan, loosened with a little chicken stock, then boiled to concentrate the flavours. A little honey stirred in to sweeten, and served alongside the chicken.

Wednesday, 10 July 2013

Red Cooked Pork

Served with steamed rice and pak choi, to cut through the richness of the fatty pork belly
Red cooking is what you would expect- the cooking process (a slow braise) imparts a red colour to your chosen meat. The flavour is rich, slightly sweet and deep. This is a variant of another recipe from Sunflower's blog- I have used other recipes, but this is my favourite. This time I made it, I did not use potatoes, which are used as a thickening agent as well as an extra comforting carb. I rather like drowning my rice in the thinner liquid, but you may feel differently- if so you can refer to Sunflowers instruction. I also cooked it for a lot longer than suggested, about 2 hours longer. For this reason, I use a casserole, and not a wok. The meat holds together, but barely, and the skin and fat from the pork belly is a soft, gelatinous treat.

You may need a trip to your local Chinatown for the fermented red beancurd and anything else, but nothing on the list of ingredients should be hard to find.

*Update 14/10/15*
This is still a fairly regular meal I make. I haven't changed anything I do cooking-wise, but I would like to recommend having some good chilli oil to hand when eating this.
I cooked this last night- here are some new photos:


Ingredients

2 tbsp oil
About 400g belly pork, cut into small chunks
1 rounded tbsp of red fermented beancurd, mashed
2 tbsp of the red pickling juice from the fermented beancurd
4 cloves garlic, chopped
2 - 3 slices ginger
1 tsp five spice powder
3 tbsp Chinese cooking wine
2 star anise
1 tbsp light soy
1 tbsp dark soy or mushroom soy
3 tsp sugar
some ground pepper

Method
Heat the oil to a high heat in a casserole, and stir fry the ginger and garlic until fragrant. Add the beancurd with some liquid from the jar, five spice and star anise, cook for a few seconds, then add the pork. Continue to stir fry for a few minutes, then add the wine, soy sauces and sugar, plus enough water to cover the pork. Bring the pan to the boil, and then reduce to a low heat.
Cook for about 2 hours on a very low simmer, until the meat is extremely soft.
Serve with rice.

Wednesday, 7 November 2012

Chengdu Chicken/ Chen du ze jee


This is yet another one of my favourites from Sunflower Food Galore. Szechuan food is often described as 'hot and numbing', this chicken dish certainly is. It is also fragrant, from the dried orange peel. Szechuan peppercorns cause a slight numbing sensation to the mouth, hence the 'numbing' title.

I haven't really touched the recipe, except when I made it the second time I used the liquid from soaking the orange peel in the recipe.

I think this makes an excellent winter dish, especially if you are tired of eating the usual  heavy casseroles and stodge to warm you up.

Ingredients
500g chicken
2 - 3 tbsp of cooking oil
2 tbsp of chilli bean paste
1 small thumb of ginger
1 small piece of chinese dried mandarin/tangerine peel
1 tbsp of Szechuan peppercorn (whole)
1/2 - 2 tsp of crushed chilli flakes
2 - 3 tsp of chinese black rice vinegar (Chinkiang vinegar)
1 - 2 tbsp Chinese cooking wine
2 tsp sugar
1 heaped tsp of cornflour
 To garnish
1/2 tsp ground Sichuan pepper
2 stalks of spring onion, finely chopped to garnish

Method
Soak the orange peel in some warm water for about 20 minutes until softened. Meanwhile, peel and finely chop or grate the the ginger. Cut the orange peel into very thin shreds, I find it easiest to use a pair of scissors.
Cut the chicken into small pieces.
Heat the oil in a wok or large frying pan. When the oil is hot, add the whole Szechuan peppercorns, and fry for a few minutes until the oil is fragrant. Remove the peppercorns and discard. Add the chicken and chilli flakes, and stir fry until the chicken is golden brown. Add in the ginger, orange peel and chilli bean paste. Cook for two more minutes, and then add the vinegar, wine and sugar. Meanwhile, slake the cornflour in a little water (mix together to make a thin paste).
 Add some water- how much depends on whether or not you like a saucy or dry dish. I like to use the orange peel soaking liquid. Add the cornflour paste, and stir until it the sauce has thickened.
Transfer to a serving dish, and sprinkle over the spring onions and ground peppercorns

Saturday, 20 October 2012

Gan Ban Niu Rou Si- Szechuan Dry-Fried Beef


Another Szechuan beef recipe with similar ingredients to this slow cooked recipe, but with a very different end result. Now I have stocked up on dried orange peel, chilli bean sauce and star anise, I need to find recipes to use them in. While I am fairly confident in making my own way in cooking European food without always referring to cookery books, I need the support of a recipe for South-East Asian food. As is normal for me, I turned to Sunflower's Food Galore for inspiration, and as usual, this blog did not disappoint. 

I have had a run of making recipes from Sunflower's blog over the past week, and this spicy beef dish was the first. I loved it, and I will definitely be making it again soon. I was also very happy with how it looked- without effort it looks attractive too.

In a previous post I mentioned I don't own a wok, as living abroad restricts my kitchen utensil buying. I made this in a big casserole. It worked, but its not ideal. Not for the actual eating, but for making it. The recipe requires you to remove hot oil during cooking, and this would have been a lot easier in a light wok with sloping sides, rather than a cast iron pan with very hot handles. So I have written this recipe as if I have used a wok, because I would certainly not recommend my method!

Ingredients:
500g lean beef steak (rump or sirloin) I used rump
2 sticks of celery
a small handful celery tender leaves, roughly cut
1 small or half large red sweet pepper
1 thumb size ginger, peeled 
2 - 4 large dried chillies
1 tbsp sichuan peppercorns
1 rounded tbsp chilli bean sauce 
about 1.5 tbsp Chinese cooking wine
dash of light soy to taste
0.5 tsp sugar
pinch of ground Szehuan pepper

 6 - 7 tbsp cooking oil


Method:

Remove any gristle from the beef, and cut into long, thin strips. Deseed the pepper, and cut into thin strips. Slice the ginger into thin strips too, and cut the ginger into matchsticks. Cut the dried chillies into chunks and de-seed them. I found this easiest to break them up with my fingers, and tap them on the chopping board to remove the seeds.

Heat the oil in a wok, and fry the whole Szechaun peppercorns and dried chillies. Remove once the chillies have turned very dark, almost black. Reserve the chillies for later, and if you like, the peppercorns. If you don't want to be crunching on them, discard.


Turn the heat to its highest setting, and add the beef to the oil, spreading it out in the pan. Do not stir. The oil will bubble up and become cloudy, and eventually settle down and become clear again. Once this has happened, stir the beef until it has browned and crisped very slightly. Push the meat to one side of the pan, and turn the heat down low. Remove all but 1 teaspoon of the oil.

Turn the heat back up to a high temperature, and add in the ginger and chilli bean sauce. Stir fry briefly, and then mix the beef into these flavourings. Add in the reserved chillies from frying previously.

Add the celery and rep pepper, and stir fry until softened to your liking. Off the heat, stir in the celery leaves, and season with light soy, sugar and the ground Szechuan peppercorns.

Monday, 15 October 2012

Szechuan Beef Claypot

I recently tried Szechuan Beef claypot at Festive Kitchen, one of the many Chinese Restaurants on William Street in Perth. It almost reached my heat tolerance, but not quite, and was addictively delicious- hence my attempt at recreating it at home.

Festive Kitchen has mostly good reviews on Urban Spoon- I like it a lot. I noticed a few negative comments regarding the service, however from both my visits, I found the staff to be very friendly and efficient. As well as this beef dish, I can recommend the soft shell crab, which comes crispy and with an incredibly liberal sprinkling of garlic, chilli and spring onion, and the deep-fried pork leg, which has a gloriously gelatinous half meat half fat quality.
The restaurant itself is a little more expensive than the noodle bars that Festive Kitchen neighbours, but for a treat it's worth a visit.

I found a recipe that looked similar to the dish we had eaten on the blog Yi Reservation. Despite a plethora of Chinese supermarkets nearby, I couldn't find anything labelled Sichuan Chilli Bean Paste, but I did find Sichuan Chilli Bean Sauce (Lee Kum Kee brand), so I bought this and hoped for the best. I also added a little extra than suggested on Yi Reservation, as sauce suggests more dilution than paste. I also left out the radish/potatoes, as the version I had at Festive Kitchen was starchless.

I don't own a wok, and because I am leaving the country in 6 weeks, do not want to buy any kitchen equipment. So instead of frying the flavourings and meat in a wok and then transferring to a casserole, I did all the cooking in the casserole. I have written the recipe out using this method, but for the original way, see the link to Yi Reservation above.

I was very pleased with the result- when I make it next time (and there will be a next time), I will probably add a few extra dried chillies. I stirred in a little extra chilli bean sauce mid cooking to heat it up, but it is also quite salty so I think extra chilli from the start would have been a better solution.
Dried spices


Ingredients
1-1.5kg beef- something suitable for casseroling
2 tbsp groundnut, vegetable or sunflower oil
5 cloves garlic, peeled and whole
2 inch ginger
2 tbsp Sichuan chili bean paste/cauce
2 tbsp soy sauce
2 small rock sugar, or brown sugar
4 tbsp Chinese cooking wine.
1 lite water or beef stock
4 star anise
6 dried chillies
1 tsp Sichuan peppercorn
1 stick cinnamon
1 tsp fennel seeds
2 cloves
1 piece dried orange peel
4 bay leaves
2 black cardamom pods

Chopped spring onion, to serve

Method
Cut the beef into 2-3cm chunks. Blanch in boiling water, and then refresh in cold water. Drain and set aside.
Heat the oil in a casserole, and gently fry the garlic, ginger and chilli bean sauce for about 3 minutes over a low heat. Add the beef to to casserole, and stir to coat in the sauce. Add the soy sauce, sugar and wine, and cook for another two minutes. Add the spices and stock. Bring the pan to a simmer, and then turn the heat down to low, and cook until the beef is tender (1-2 hours).
Sprinkle over the chopped spring onion before serving with rice.

If you have leftovers, you can also turn it into spicy beef noodle soup, simply by adding some freshly cooked noodles to the broth.

Tuesday, 9 October 2012

Mughlai Lamb Biriani

There are times when I just want to create a meal using what I have to hand in the kitchen, or what looks particularly good when I am out food shopping. But I also enjoy following the instructions of a well written recipe, especially if it is something I would have never been able to come up with myself without guidance. Of course any 'original' recipe that I make now will have been shaped by reading cookery books, and making recipes from times and cultures that are unfamiliar to my own. Layering up the rice and spicy lamb for this biriani and letting it steam reminded me of making an Iranian polo, reminding me of how little is new in cooking, but constantly borrowed and adapted.

My parent's copy of Madhur Jaffrey's Indian Cookery is a long standing favourite for me, everything I have made from there has been a delicious success. We have had it for as long as I can remember, and I have finally made the lamb biriani, a recipe that takes about 6 hours to make, but is worth every minute.

Ingredients: 
425g basmati rice
6 litres water
3 tbsp salt
1 tsp saffron threads
2 tbsp warm milk
3 medium onions, peeled
4 cloves garlic, peeled
1” fresh ginger, peeled and coarsely chopped
13 tbsp vegetable oil
3 tbsp sultanas
4 tbsp sliced almonds
1 kg  boneless lamb shoulder, cut into 2-3cm cubes
250 ml plain yoghurt ( I used Greek)
5-6 whole cloves
½ tsp black peppercorns
½ tsp cardamom seeds (from about 6-8 pods)
1 tsp cumin seeds
1 tsp coriander seeds
3cm cinnamon stick
1/6 nutmeg, grated (probably about ¼ tsp)
¼ tsp cayenne pepper
1 oz/ 25 g unsalted buttercut into 8 pieces
3 hard boiled eggs

Method
 Wash the rice in several changes of water, until the water runs clear. Drain and put into a large bowl. Add approximately 2 litres of wate. Add 1 tbsp salt to the water. Mix and leave to soak for 3 hours.
Now 'toast' the saffron threads over a medium heat in an oil-free frying pan. After about a minute or two, they will darken slightly. Remove from the pan, and set aside. Heat the milk to lukewarm- this is probably easiest to do in a microwave. Crumble the saffron threads into the milk, and leave to infuse.

Now we prepare the garnish. Cut two of the onions in half lengthwise, and finely slice into half moons. Put 6 tbsp of oil in a frying pan over a medium high heat. Add the onion rings, and fry until they are crisp and golden. Remove with a slotted spoon onto some kitchen towel to absorb any excess oil. Put the sultanas in the same pan, until the puff up. This won't take very long at all. Remove, setting on some more kitchen towel. Finally, add the almonds, and cook until they are golden. Put with the onions and sultanas.You can set the garnish ingredients aside now in a container while you continue with the rest of the recipe.

Chop the remaining onion coarsely. Put chopped onion, garlic, ginger, 2 tbsp of sliced almonds and 3 tbsp water into a blender or food processor and blend until you have a very smooth paste. Set aside.

In a heavy bottomed casserole, sear the lamb in batches so it is properly browned (not just greyed). As you finish each batch, remove with a slotted spoon and set aside. When all the lamb is done, add a few more tbsp of oil to the pan, and fry the curry paste for about 3 minutes. If it sticks, add a little water. Return the lamb and any accumulated meat juices to the casserole. Add the yogurt, one tablespoon at a time, until it is all incorporated. Add a teaspoon of salt and 150ml water. Stir and bring to a simmer. Cover, and turn the heat down to a low setting, leaving to cook for 30 minutes.

Using a spice grinder, or a pestle and morter with a lot of strength, grind the cloves, peppercorns, coriander seeds and cinnamon stick. Add the grated nutmeg.
After the lamb's 30 minute cooking time, add the ground spices to the pan along with the cayenne pepper. Remove the lid and increase the heat to a medium setting. Let the sauce thicken and reduce to about 300ml, stirring to prevent sticking. Turn off the heat. If needed, skim off any excess fat.

Preheat the oven to 150°C.  Bring 3.6 litres of water to a rolling boil in a large pot. Add 1 tbsp salt. Drain the rice that’s been soaking for 3 hours and rinse under cold running water. Slowly scatter the rice into the boiling water. Once all the rice has been added, bring the water back to a boil and cook for exactly 6 minutes. Drain.

Put the rice on top of the meat, piling it high in the center, like a hill. Take a chopstick or the handle of a long spoon and make a 1” wide hole in the center of the peak, like a well, right down to the bottom of the pan. Drizzle the saffron milk in streaks along the sides of the hill. Lay the pats of butter on the sides as well and scatter 2 tbsp of the browned onions over it all.

Cover with aluminum foil, sealing the edges well. Bake in the oven for 1 hour.

Towards the end of cooking time, peel and quarter lengthwise the hard boiled eggs.

To serve, gently mix the rice and lamb together. Decorate with the almonds, onions and sultanas, and hard boiled eggs.


Friday, 28 September 2012

Spaghetti and Meatballs


for the sauce
2 tbsp olive oil
1 large onion, peeled and chopped finely
2 sticks of celery, finely chopped
1 carrot, finely chopped
3 cloves of garlic, finely chopped
2 sprigs of rosemary, leaves finely chopped
2 tsp dried oregano
2x800g tins of chopped tomatoes
pinch of chilli powder (optional)
pinch sugar (if needed, see below)

 for the meatballs
500g beef mince
500g pork mince
1 crushed clove of garlic
small bunch of flat leaf parsley, leaves only, chopped finely
3-4 anchovies, finely chopped/minced

1 tbsp olive oil
half a glass of red wine
750g spaghetti or other long pasta
Basil leaves
Freshly grated parmesan.

Start with the sauce. In a heavy bottomed saucepan, gently fry the onion, garlic, celery and carrot until they are translucent and softened. Add the  rosemary and oregano, and cook for another 2 minutes. Stir in the tinned tomatoes, and sprinkle in the chilli powder. Turn the heat up to a simmer, and leave to gently bubble until it is thick and pulpy. Stir at frequent intervals so the bottom does not burn. Taste near the end- if the tomatoes turn out to be not so sweet, add a little bit of sugar. Be generous with the pepper grinder, but hold off on adding salt until the very end of cooking time.

While the sauce is cooking, mix together the meat, garlic, parsley and anchovies, along with a good amount of salt and pepper. Form into balls a little smaller that a walnut.

 In a hot frying pan, quickly brown the meatballs in batchs, setting them aside as the are done. When they are all browned, put them in the sauce and stir the in gently, being careful not not break them up. With the heat still under the pan used to brown the meatball, pour in the red wine, let it bubble up and cook off the harsh alcohol smell, then pour this into the sauce as well. Let everything cook together over a low heat while you get on with the pasta. Taste the sauce, and adjust the seasoning if you feel it needs it.

Drain the cooked pasta, and mix with the meatballs. Tear up to basil leaves and mix these in too. Serve with lots of parmesan.


If you make a big batch of sauce and only cook a small amount of pasta, I recommend using some of the meatballs and sauce to make a homespun meatball sub. Get a submarine roll, or french bread, fill with reheated sauce and meatballs, and sprinkle with a mixture of parmesan and mozzarella. Bake in a hot oven for a few minutes until the cheese is melty.


Friday, 25 May 2012

Chilli con Carne


Despite popular belief, chilli con carne with kidney beans is a British concoction, not American . In the States they do make chilli, and take the whole business very seriously, but the beans are served alongside. Rice as a side dish is also a British thing, saltine crackers seem to be the typical accompaniment in the US.

Bad chilli con carne seems to be almost expected- it's student food, or greasy pub food, but there's no reason for this to be the case. Well made, it's delicious, warming and comforting. I use Hugh Fearnley Whittingstall's recipe with little variation. It's never failed me. In his recipe, he suggests making a rich tomato sauce by reducing some tinned tomatoes with garlic until pulpy. I used to do that, but now I just add the tinned tomatoes straight from the can, and cook the chilli for longer, on the lowest possible heat. Both methods work, I just prefer to avoid the extra washing up.

Chilli with sour cream and cornbread

Ingredients
Olive oil, for frying
 1kg minced beef
750g pork shoulder or similar cut, cut into 2cm cubes
500g chorizo, cut into 1 cm cubes
2 400g tins of kidney beans, drained, or 200g dried kidney beans, soaked overnight
2 onions, peeled and chopped
4 cloves garlic, peeled and chopped
800g tin chopped tomatoes
1 tbsp dried oregano
2 tsp cumin
chilli powder, to taste. Start with about a tbsp, and increase accordingly
1 cinnamon stick
2 bay leaves
1 tsp good quality cocoa
pinch brown sugar
1 tbsp red wine vinegar
750 ml pork or beef stock, or kidney bean cooking water

Method
If you are using dried beans, drain them from the soaking liquid, and put in a saucepan. Cover with fresh water- about twice the volume of the beans. Bring to the boil, and boil hard for at least 10 minutes. Boiling kills the toxins in the beans, so don't miss this stage out. Turn the heat down to low and cook until the beans are soft, and not at all chalky. Retain the cooking water if you don't have any stock.

Heat a tablespooon of olive oil in a large frying pan. Brown the meats in batches, over a high heat. You will probably need to add more oil to the frying pan. Once a frying panful is done, transfer the contents to a casserole or heavy bottomed saucepan, something that is large enough to hold everything. Cook the onions and garlic in the same frying pan as the meat, over a lower heat, until softened. Add these to the casserole.

Add the remaining ingredients to the casserole, giving it a good stir. Put the pot on over a low heat, partially covered. Cook for at least two hours. Season-salt, pepper, and possibly Tabasco.


Monday, 7 May 2012

Albalu Polo- Iranian Lamb and Sour Cherry Pilau


I love reading about and cooking Middle Eastern food, in particular Iranian. My recipe book collection has a high proportion of books about food from this part of the world. Unfortunately I am about as far as I could be from my books, but I do have a mental catalogue of the dishes I want to cook. This sour cherry dish is one of them.

I've never seen fresh sour cherries on sale- not only are they not commonly grown, they have a limited season. However, I've used bottled sour or Morello cherries with good results. With regard to the lamb, I’ve used both shoulder and leg in this type of dish, and I definitely prefer shoulder. The quantity of meat is pretty frugal for Western diets, if it bothers you, increase the quantity of lamb.

Now for the most important element- the rice. Cooking rice is a serious business in Iran, alongside bread it is their staple food. The Iranians don't export their superior rice varieties, but keep it in the country. Rice dishes from Iran can be grouped into three types, characterised by the cooking method:

Kateh- simply cooked in salted water with butter

Damy- Similar to the above, but other ingredients are stirred into the rice before cooking, such as lentils

Polo-This is the method used in the recipe below, and the tastiest. You soak the rice for at least an hour, and then par-boil it. You return it to the saucepan, and steam it over a low heat for 40 minutes or so. By the end of cooking time, you are left with very light, fluffy rice and a golden brown crust on the bottom- the tah-deeg. Crispy rice shouldn’t be so tasty, but it is. You break it into pieces and divide it as fairly as you can.


Ingredients

450g basmati rice
One large onion, peeled and chopped medium fine
Olive oil
Pinch saffron strands, ground
1/2 teaspoon cinnamon
pinch ground nutmeg
pinch ground cloves
4oog lamb shoulder, cut into small pieces
1 jar morello/sour cherries, about 500g
1-2 tbsp light honey or sugar
unsalted butter

Method.
Soak the rice in twice its volume of cold, salted water. Leave while you get on with the lamb. Fry the onion in a little olive oil in a heavy bottomed saucepan or casserole. Once it has softened, stir in the lamb and spices, plus salt and freshly ground black pepper. Add enough water to cover- about 500ml. You don’t need to brown the lamb like you would for an English stew. Half cover with a lid, and cook over a low heat for 1hr-1hr and a half until the lamb is tender and the liquid is reduced. About 20 minutes before it is ready, add the cherries and sugar. At the end of cooking, you should have quite a thick sauce, reduce a over a high heat if it seems thin. Taste for salt/sugar/spice adjustments.


Put 2 litres salted water on to boil. Drain the rice, and rinse in a sieve until the water runs clear. Once the water has reached a rolling boil, add the rice and cook for 4-7 minutes, until the rice is very nearly cooked. It should still have a bite in the centre, but be almost ready to eat. Drain, and mix in a little butter. Heat some butter in a heavy bottomed( NON-STICK!) saucepan that has a lid. With the pan still on the heat, line the base with some of the rice-just enough to cover. Spoon over a half of the lamb, then cover with half of what’s left of the rice. Layer the second half of the lamb on that, and finally the remainder of the rice. Shape the top of the rice into a slightly domed shape with a wooden spoon, the highest part in the centre. Cook on a medium high heat for 2 minutes, and then turn the heat down to the lowest heat, put the lid on and cook for 40 minutes. While it is cooking, put a chopping board or baking sheet in the freezer (something metal is best). When the cooking time is up, put the pan on the frozen surface for 1 minute. This helps the bottom of the rice come loose from the pan. Serve, either straight from the pan, or up-end it into a dish, where, if you’re lucky, you’ll end up with a nicely moulded cake of lamb pilaf.

Wednesday, 25 April 2012

Quick and Delicious Roast Chicken

In this recipe, you can roast a good-sized chicken in a little over an hour. To achieve this, you have to start with a spatchcocked, or butterflied, bird, which is a bird that has had its backbone removed and then pressed flat. You can get a butcher to do this for you, or you can do it yourself. When I first did this I was surprised at how straightforward a procedure it was, and it makes you feel Blue Peter competent.
Having a shorter roasting time then traditional roast chicken means you have a much juicier end result. Cooking it on a rack over some liquid makes for instant gravy, all you really need is something green and some bread to mop up the juices for a low-stress roast.

Ingredients
1 medium roasting chicken- 1.5-2kg, spatchcocked
1 bay leaf
2 stalks rosemary
2 cloves garlic
Olive oil
250ml chicken stock
1 glass white wine


Method
If you haven't got a butcher to spatchcock your chicken, do it yourself. Turn it breast-side down, and which a sharp knife or pair of scissors, cut down one side of the backbone, then the other side, then remove it. You have to cut through the rib bones of the chicken, but this is easier than it sounds. Turn it over and flatten the chicken out.
Finely chop the bay leaf, the leaves from the rosemary and the garlic together. Put in a bowl, and mix with enough olive oil to make a spreadable ointment for the chicken. Season with salt and pepper. Rub this savoury mix all over the chicken, underside included. Leave for as long as you can- 24 hours would be great, but if you have to proceed straight away it's not a disaster. Just remember, if you leave it to macerate in the fridge, then take it out in time to come to room temperature.
When you are ready to cook, preheat the oven to 200C. In a roasting dish, pour in the chicken stock and wine. Put a rack in the roasting tin, and sit the chicken breast side down on the rack. Roast for half an hour, and then turn the chicken the right way up and roast for another half hour. By this time the chicken should be cooked- if you are not sure, use a knife to make a cut in the thigh- the juices should run clear.
 Let it sit for a few minutes while you skim some of the fat from the juices underneath. Serve the chicken with the roasting tin juices and your choice of accompaniments.

Monday, 9 April 2012

Buffalo Wings


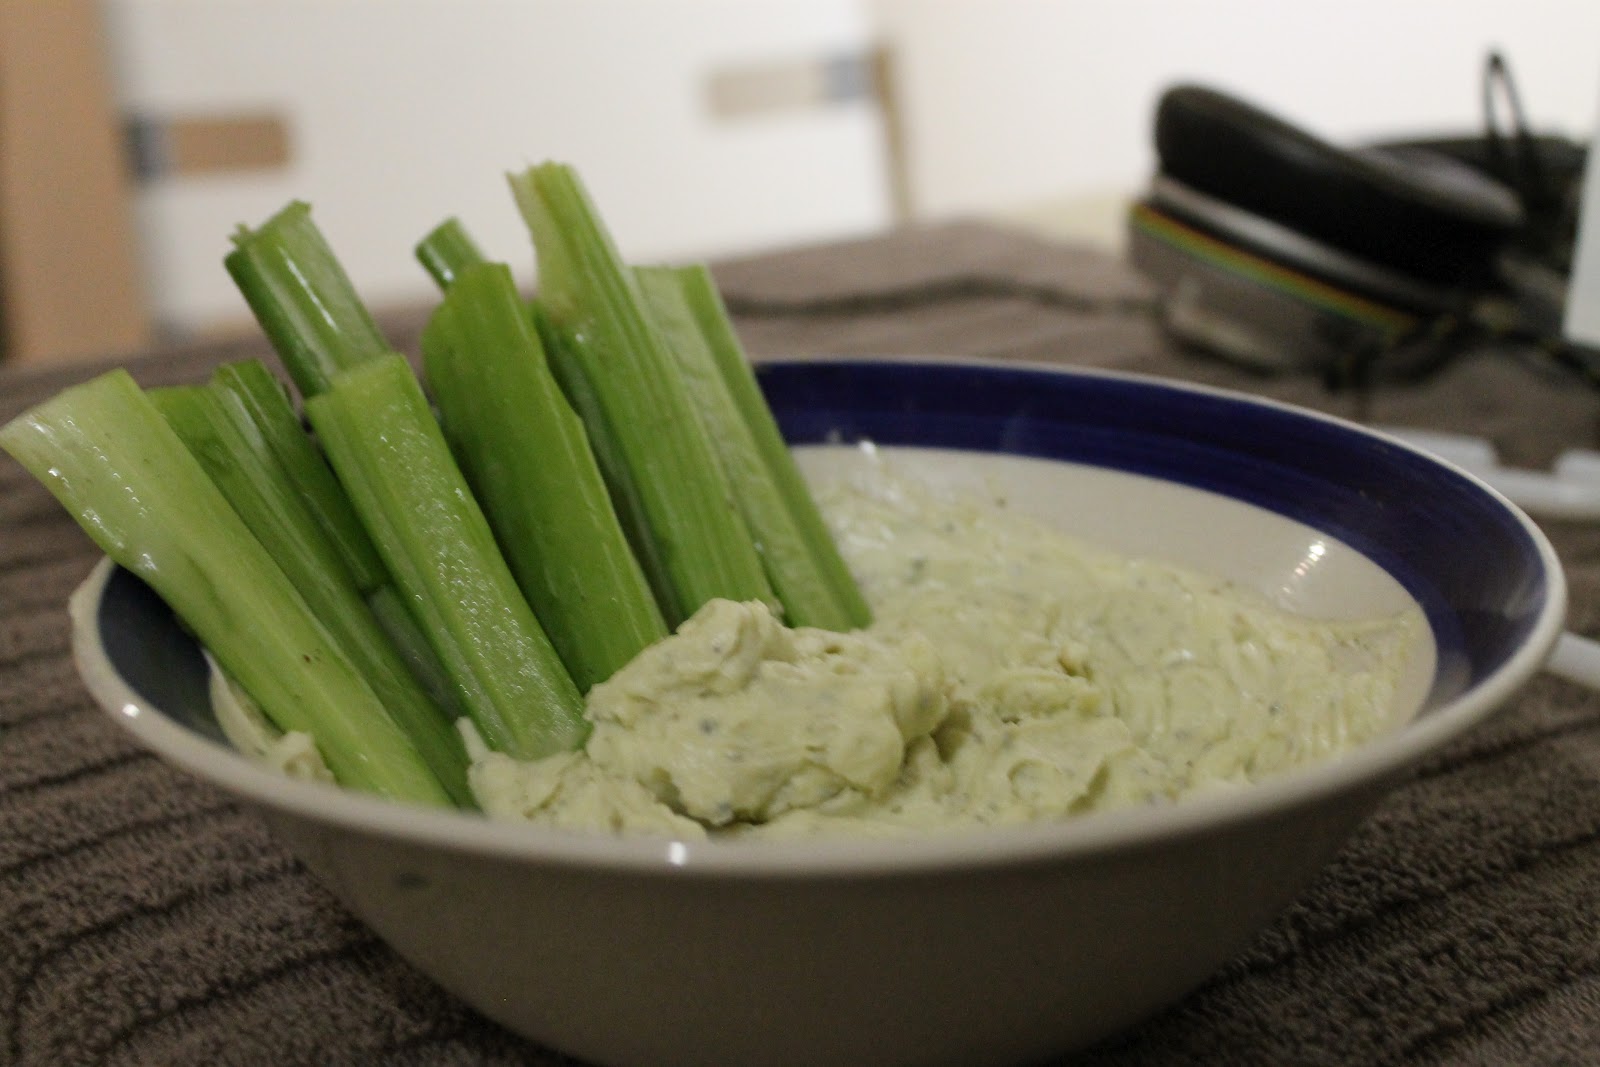
These are delicious, spicy, juicy, messy morsels to be eaten from a shared plate with your fingers. The sauce that turns fried chicken wings into buffalo is just butter, vinegar and hot sauce, but somehow it works. Alongside you have celery sticks and a blue cheese dip to cut through the richness. The leftover chicken flavoured oil is great used for the roux in gumbo.
Ingredients
1-1.5kg chicken wings
50g plain flour
1 heaped tsp salt
freshly ground black pepper
pinch cayenne
Vegetable/groundnut oil for deep frying
Sauce
4 tbsp unsalted butter
Hot sauce (Tabasco or otherwise). Start with 2 tbsps, add more to your liking.
2 tbsp red wine vinegar
Blue Cheese Dip
75-100g blue cheese
4 tbsp creme fraiche
1 tbsp olive oil
few drops red wine vinegar
1 tsp mustard powder
Celery sticks, to serve

Method
For the blue cheese dip- either mix all the ingredients in a blender, or mix by hand crushing the blue cheese with a fork. Put in the fridge until you are ready to eat.
Heat the oil in a large saucepan, put the oven on a low heat. Mix the flour, salt, pepper and cayenne in a large freezer bag. Put the chicken wings in the bag, and shake hard to coat. Deep fry in batches for 8-10 minutes until pale golden. Remove with a slotted spoon, keeping the cooked ones warm in the oven until they are all cooked. During the cooking time, melt the butter and stir in the hot sauce and vinegar. When all the wings are cooked, put in a bowl and coat with the sauce. Serve immediately with the celery and blue cheese dressing and some kitchen roll for chickeny fingers.

Saturday, 7 January 2012

Lamb, Feta and Sumac Piroshki

Piroshki is a blanket term for little Russian pies that come with various fillings and can be baked, fried or poached. My filling is inauthentic, I've gone for Middle-Eastern flavours, but the pastry is traditional. I've justified the feta and sumac with some stretches of geography, Georgia borders Russia, Georgian food has influences from the Middle East... but really, they taste so good, so that should be reason enough to make them.


I first came across the idea for these pastries in Meat by Hugh Fearnley-Whittingstall, as a way to use up leftover roast lamb, it does make a change from the usual shepherd's pie. When I came to make them this time, I only had about 1/2 the amount of suggested meat, so made up the remaining weight with crumbled feta. That inspired the use of sumac, a tart red spice that is favoured in Turkey and the Middle East.


Ingredients
For the pastry:
225g plain flour
1 tsp baking powder
1/2 tsp salt
2 eggs
2 tablespoons vegetable oil
a little beaten egg, to glaze
For the filling:
1 tbsp olive oil
1 tsp cumin seeds, ground
1 tsp coriander seeds, ground
1 small onion, finely chopped
1 clove garlic, finely chopped
100 grams leftover roast lamb, finely chopped
a little liquid- stock, wine or water
1 tsp sumac
pinch chilli powder
100 grams feta, crumbled
 
Method
Start by making the pastry: sift the flour, salt and baking powder together into a mixing bowl. Make a well in the centre. Whisk together the oil and eggs, then pour into the well. Gradually draw in the dry ingredients to the liquid with a wooden spoon, then beat until smooth. You are looking for a soft but not sticky dough, add a little cold water if you need it. On a lightly floured surface, knead for about 5 minutes until the dough is smooth and elastic. Put the dough in a lightly oiled bowl, covered, and leave for around an hour while you get on with the filling.

Heat the olive oil over  medium heat, and add the spices. Cook for about 1 minute, then add the onion and garlic. Let them cook gently until they are softened. The turn up the heat and add the lamb. Let it brown slightly, then turn the heat down, and add your chosen liquid, jut enough to lubricate it, not so much as to drown it. Let it cook for another 3 minutes over a low heat, then remove. Stir in the sumac and chilli powder and season with salt and pepper. Allow to cool, then mix in the crumbled feta.
Preheat the oven to 200 degrees. Line a baking tray Roll out the dough on a floured surface, and cut out 8cm rounds with a cutter. Put a spoonful of filling onto each round, slightly off-centre. Moisten the edges with a little water and a pastry brush, and fold the dough over to meet the other side, pressing down to seal. Using your hands, shape them into a crescent. Transfer to the baking sheet, and brush with beaten egg. Bake for 10-15 minute until the piroshki are nicely browned, and serve warm.

Thursday, 8 December 2011

Epaule d'Agneau Boulangère


This is Sunday lunch made easy, something for the days when the military precision of a traditional roast is too much to deal with. There's a little preparation, then you can forget about it while you get on with other things. A few hours later you are rewarded with fork-tender meat and melting potatoes, imbued with the fat and juices from the lamb. All you need alongside is something green, maybe some beans with a little butter, although recently I upped my game with purple sprouting broccoli, dressed in anchovy, garlic, parsley and olive oil.

 Ingredients
1 shoulder of lamb
olive oil
glass white wine
1-1.5 kg waxy potatoes
1 onion
3 cloves garlic
Leaves from a few sprigs of rosemary

Method
Preheat the oven to its highest setting. Sit the lamb in roasting tin that will be large enough to accommodate the lamb and the potatoes, sliced, later. Rub your joint with a little olive oil, and season with salt and black pepper. Roast for about 20 minutes, then remove from the oven. Now peel and slice the potatoes and onion, and peel and roughly chop the garlic. Chop the rosemary Turn the heat down to 160 degrees. Remove the pan from the oven, and put the lamb on a chopping board while you get in with arranging the vegetables. Deglaze the pan with some white wine, scraping at any browned bits in the pan. Now add the potatoes, onions, garlic and rosemary. Many recipes tell you to layer the onion and potato, but I find it easier and just as good to toss them all in together, along with some salt and pepper. Place the lamb back on top, and put the whole thing back in the oven. Leave for 3-4 hours, till the meat is tender.