Showing posts with label USA. Show all posts

Thursday, 16 October 2014

Beignets

I love reading and learning about Louisianan food, but I haven’t cooked that many dishes from the state. I now make a gumbo without a recipe, feeling comfortable enough to make any changes and tweaks as the mood suits me. I’ll occasionally cook a jambalaya, but will usually refer to a recipe. I have made an attempt at doberge cake, an extravagant layered chocolate confection which I think most people would buy in rather than make at home. It was delicious, but is quite a labour-heavy experience to make.  I have made a pecan pie, using the filling recipe from The Gumbo Pages although that’s not exclusive to Louisiana.

My latest addition to this list are beignets- the state doughnut of Louisiana (as an aside- I love the idea of an official state doughnut, although after reading this article, sadly I don't think there is a doughnut per state). Beignets can be made with a choux pastry or a yeast-leaved dough. I made the latter. I think the place to get beignets in New Orleans sells the yeasted type (I could be wrong about this though). I will have to try the choux pastry version too though, to complete my beignet education. 


The recipe I used was from Taste and Tell Blog (scroll down to the bottom of the page for the recipe). They were definitely a success, except for the first 2 I made which were a little uncooked in the middle- I don't own a thermometer for deep frying.


My favourite thing about this recipe is that once you have made the dough, you can keep it in the fridge for up to a week with no ill effects. So whenever you fancy a treat, you can tear off enough dough for a beignet or two, and cook it to order. Like most deep-fried foods, it’s best to eat them fresh out of the pan rather than letting them sit around.

Being able to keep a ball of the dough in the fridge and cook in batches over the week helped me gain a better feeling for when the oil was hot enough to put the uncooked beignet in the pan, and tell when it was ready to be taken out. It also gave me more opportunities for experimentation, such as making a chocolate and salted caramel dipping sauce. This was my only deviation from the recipe, but there is a lot of scope for new ideas. Having said that, a plain beignet, liberally dusted with icing sugar is a wonderful thing, and doesn’t require anything else- except maybe some coffee alongside.


Monday, 28 January 2013

Key Lime Pie


I suppose outside of the States, possibly even Florida, key lime pie is rarely made with actual key limes. Instead, the name now is used to evoke an acid-laced cream inside a biscuit base. I had never tried, let alone made my own KLP, but I have heard good things, and I really like lime. As normal, I made Nigella's version for my starting point.
As much as I enjoyed it, (and I did, as did my fellow eaters) I could tell on my first mouthful that this would be hugely improved with crushed ginger biscuits for the base, instead of digestives. The filling is so light that I feel it needs a robust as possible outside, which the ginger snaps would provide. I tried the pie after the minimum setting time, and 24 hours later- leaving it overnight is a definite improvement to the texture of the filling.

Ingredients
For the base and sides:
250g digestive biscuits (see above)
50g unsalted butter

For the filling:
4 limes
400g (or more likely 397g) condensed milk, preferably chilled
250ml double cream

Method
Grease the sides and base of a a 25cm round springform cake tin, or pie dish. As you can see from the picture, I had neither and used a square cake tin, which worked just fine too. Crush the biscuits finely in a mixing bowl, melt the butter and stir it into the crumbs. It should be a damp, sandy consistency, if it is a little dry add some more melted butter. Press the biscuit mix onto the base of the cake or pie tine, and up the sides as well. Put in the fridge while you get on with the filling.

Zest and juice the limes. Set the zest aside in the fridge, clingfilmed, for decoration later. In a large mixing bowl, mix the condensed milk and lime juice- don't worry if it curdles. Add the cream, and whisk either by hand, electric whisk or freestanding mixture, until it has thickened and increased in volume. It will feel both light and unctuous. By hand, the whisking took about 5 minutes, so it isn't hard work at all. Pour the filling into your prepared base, smoothing out or swirling the top, whatever your aesthetic preference. Let it chill for a minimum of 4 hours, but preferably overnight. Sprinkle with the reserved zest before serving.

Friday, 11 May 2012

Nigella's Cornbread


Ingredients
175g cornmeal
125g plain flour 
45 g sugar 
1 fat pinch of salt
 1 tbsp baking powder
 1 egg 
45 g melted butter  
250 ml full fat milk 


Method
Preheat the oven to 200C, grease a square tin, or other suitable receptacle. I used a 20cm cake tin for the cornbread in the picture. Beat the egg into the melted butter along with the milk. Stir in the dry ingredients, just enough to combine. Don't worry if it is a bit lumpy. Scrape into the tin and bake for about 20 minutes, until it is a deeper golden shade and pulling away from the sides slightly.

Monday, 9 April 2012

Buffalo Wings


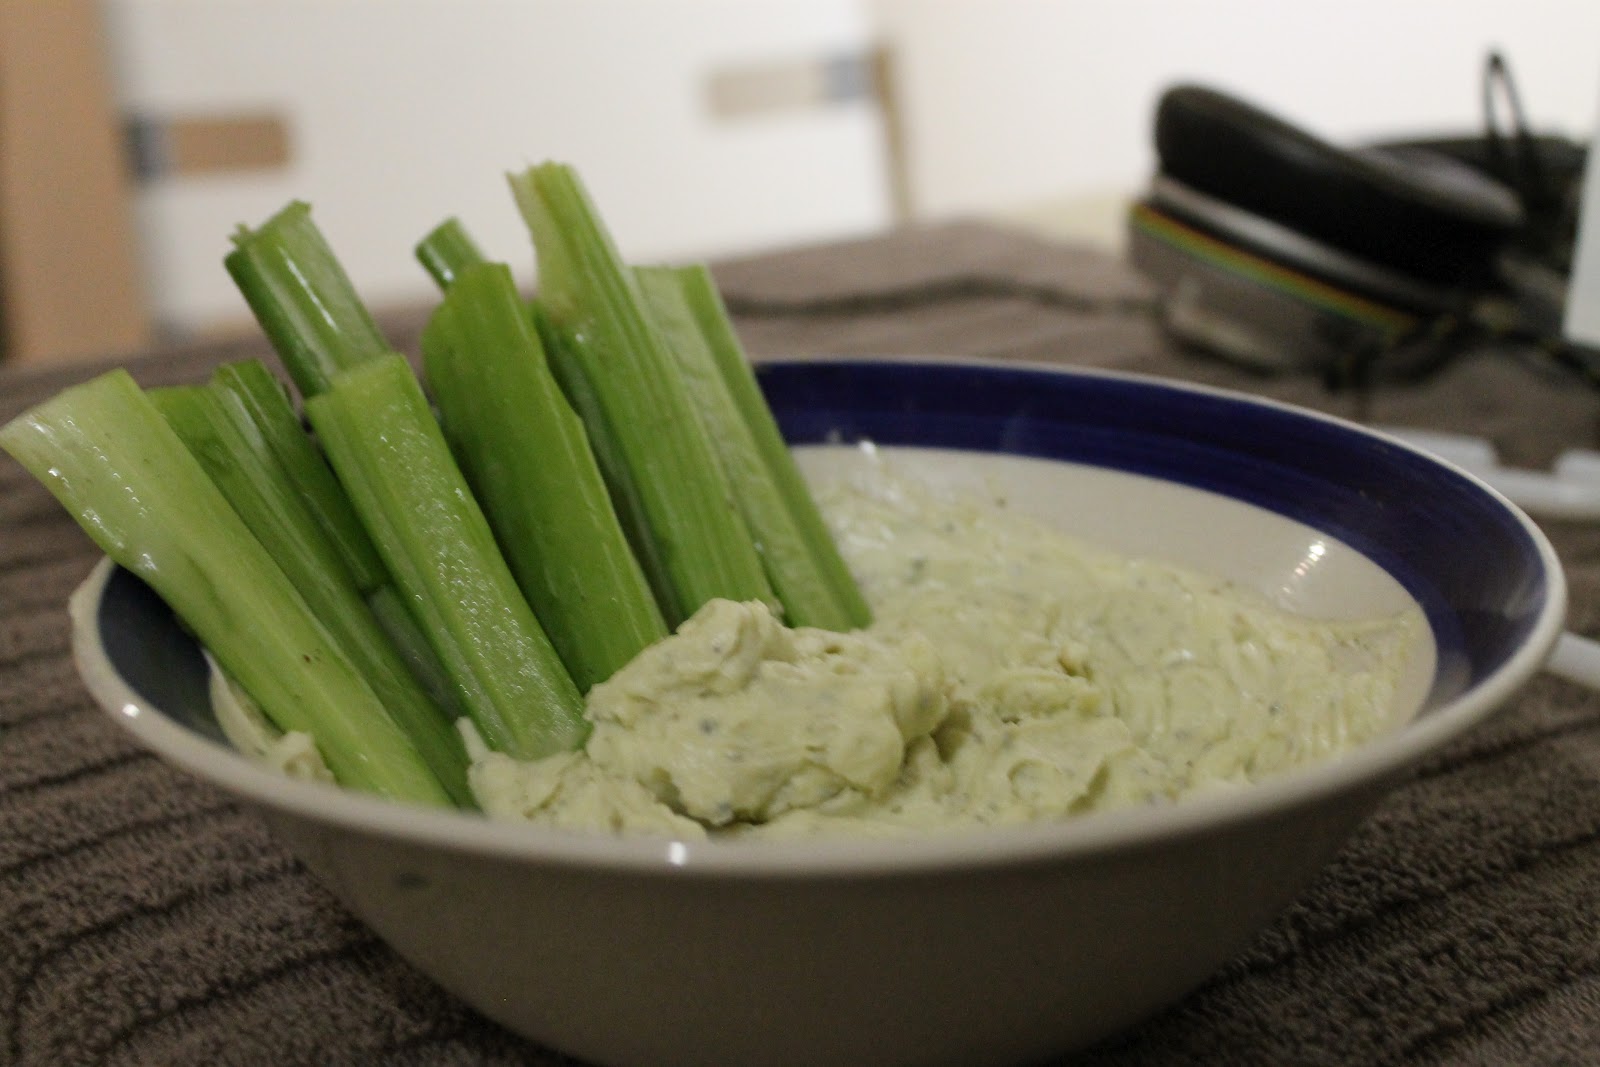
These are delicious, spicy, juicy, messy morsels to be eaten from a shared plate with your fingers. The sauce that turns fried chicken wings into buffalo is just butter, vinegar and hot sauce, but somehow it works. Alongside you have celery sticks and a blue cheese dip to cut through the richness. The leftover chicken flavoured oil is great used for the roux in gumbo.
Ingredients
1-1.5kg chicken wings
50g plain flour
1 heaped tsp salt
freshly ground black pepper
pinch cayenne
Vegetable/groundnut oil for deep frying
Sauce
4 tbsp unsalted butter
Hot sauce (Tabasco or otherwise). Start with 2 tbsps, add more to your liking.
2 tbsp red wine vinegar
Blue Cheese Dip
75-100g blue cheese
4 tbsp creme fraiche
1 tbsp olive oil
few drops red wine vinegar
1 tsp mustard powder
Celery sticks, to serve

Method
For the blue cheese dip- either mix all the ingredients in a blender, or mix by hand crushing the blue cheese with a fork. Put in the fridge until you are ready to eat.
Heat the oil in a large saucepan, put the oven on a low heat. Mix the flour, salt, pepper and cayenne in a large freezer bag. Put the chicken wings in the bag, and shake hard to coat. Deep fry in batches for 8-10 minutes until pale golden. Remove with a slotted spoon, keeping the cooked ones warm in the oven until they are all cooked. During the cooking time, melt the butter and stir in the hot sauce and vinegar. When all the wings are cooked, put in a bowl and coat with the sauce. Serve immediately with the celery and blue cheese dressing and some kitchen roll for chickeny fingers.

Wednesday, 7 March 2012

Chicken and Chorizo Gumbo


This is the second gumbo recipe on this blog, the other on can be found here. I usually make a chicken and chorizo one, on good days I'll add some prawns too. Andouille, a coarse grained Cajun sausage is what I should be using, but I've yet to see it on sale. Instead I use chorizo, which isn't authentic, but its smoky-spiciness goes well in gumbo.
Gumbo can be thickened in three ways, with okra, with filé powder or with a roux. Okra is one of the few foods I really dislike and filé powder- dried and crushed sassafras leaves- is another ingredient that eludes me. So I have only made it with a roux, which according to Wikipedia is now the most popular method. This time I used pork fat for the roux, and was really pleased with the result.
According to the Gumbo Pages (and where else would you go for a gumbo recipe?) the three golden rules for making a good gumbo are:
  • use homemade stock 
  • use homemade stock
  • use homemade stock
Which explains the subject of my previous post. It does make a difference, both in texture and flavour, however I have made it with bought stock before and it is still a dish worth eating. It slightly lacks the body that homemade stock gives.
Technically gumbo is soup, but not the light-lunch variety. It is thick and bolstering, served over plain rice- definitely a meal in itself.

Edit: Some notes on making the roux.
I don't claim to be a gumbo expert; I still have a lot to learn. I was looking at some other websites devoted to cooking gumbo, which unlike The Gumbo Pages, have photos. I was struck by how much darker the roux and finished dish were than my gumbos had been. So I experimented with cooking my roux to a milk chocolate hue, previously I had not gone further than a biscuit brown. The taste at the end is richer and nuttier.
It takes a long time to get the roux to this colour, at least 30 minutes. You can't rush it, it has to be done over a low heat, and be stirred constantly, or it will burn and you have to start again. And please stir gently, splashing yourself with this roux, or Cajun napalm, gives terrible burns.
The darker the roux the thinner the soup, but even so, it is still relatively thick. The general consensus seems to be pale rouxs for gumbos with seafood, and darker rouxs for richer, meatier soups.

Paler Roux
Dark Roux


Gumbo made with dark roux


Ingredients
Creole Seasoning:
1 tsp onion powder
1 tsp garlic powder
1 tsp dried oregano
1 tsp dried basil
1/2 tsp dried thyme
1/2 tsp freshly ground black pepper
1/2 tsp freshly ground white pepper
1/2 tsp cayenne pepper
2 1/2 tsp sweet paprika

800g skinless, boneless chicken thighs , cut into 2cm cubes (I bought 1kg bone-in thighs, and used the bones in my stock along with the chicken carcass)
200g cooking chorizo, diced into cubes
1 green pepper
1 onion
3 sticks celery
4 cloves garlic
1 cup (250ml) pork fat or oil
1 cup (250ml) plain flour
1.5  litres chicken stock
Cayenne pepper
1 tsp dried thyme
Tabasco or other hot sauce
Bunch flat leaf parsley, leaves only, roughly chopped
5 spring onions, chopped

Boiled rice, to serve

Method
Place the chicken in a bowl. Mix together the ingredients for the seasoning, and sprinkle over the chicken, making sure it is all coated. Set aside while you deal with the vegetables. Peel and dice the onion, deseed and dice the pepper, dice the celery, and peel and finely chop the garlic. Set these aside too.
Now to brown the meats: Heat a little oil in a frying pan over a high flame, and quickly brown the chicken. Remove, and do the same with the chorizo. Remove the chorizo from the pan with a slotted spoon so as much fat as possible is left behind.
Start the roux; in a large heavy bottomed saucepan, heat the fat. When it is hot, add the flour. Stir constantly until the mixture turns a biscuity colour and smells toasted. This takes a while, but it's an  important stage for flavour. Stir in the prepared vegetables into the roux so the mixture coats them like batter. Cook for about 5 minutes until softened, stirring regularly. Mix in the meats and then pour in the stock. Stir. Season with the cayenne, dried thyme, hot sauce and pepper. How much cayenne and hot sauce you use is up to you. Leave to cook on a low heat for at least an hour, until the soup has thickened. Taste and make any adjustments you feel it needs- I always add salt now, and usually more hot sauce. Stir in the parsley and spring onion before serving.

Thursday, 1 March 2012

Pecan Pie


Rewatching Twin Peaks has made me yearn for some Damn Fine Pie. Dale Cooper actually always had cherry or huckleberry pie, but I'm sure he would've approved. The Gumbo Pages has a rather lovely entry on pecan pie, which inspired me to finally get round to making it. I used the filling from the second recipe, but the recipe that follows has a few of my own touches that I needed to put in. A 9" pie crust is listed as one of the ingredients. I'm not sure if it is assumed the reader will know how to make a pie crust off the top of their head, or will just buy one from the supermarket. I didn't want to buy a ready made one, so I had to decide on what base I was going to make. Presumably shortcrust, and I think a pecan pie would usually have sweet pastry instead of plain. I decided to use the pastry recipe based on the one from Heston Blumenthal's treacle tart recipe, as I think of treacle tart as a kind of British version of Pecan pie. I have made the treacle tart before, and it was wonderful, as you might expect of any Heston recipe. Filling-wise, I didn't want to go on a special trip looking for corn syrup, so I used a mixture of maple and golden.

It took me three days to be able to try the fruits of my labours. I made the pastry on Tuesday, let it rest overnight, finished cooking it on Wednesday, but had to let it cool and set before I could eat it. So I finally got to try it today, and it was worth the wait. It won't take everyone 3 days, but it will if you insist on making it midweek when you're doing 9-5. Save it for the weekend, basically.

This was the first time I have made pecan pie, and it wasn't the smoothest cooking experience. But next time (and there will be a next time) it'll be far more pleasurable experience to make and I'll be a lot more confident cooking it. Below are the reasons why it was difficult, if you are going to make the recipe, read on.

First of all, the pastry. The standard recipe for shortcrust pastry contains a 2:1 ratio of flour to flour. This recipe takes it up to equal proportions of both, which is likely to raise the eyebrows of any long-time pastry maker. This is one of the few examples in cooking where lack of knowledge might be a bonus; when I saw that the recipe used 400g of butter and 400g flour, I assumed it would be difficult, whereas if I had never made pastry before, I wouldn't think anything of it.The procedure for making it is much the same, starting with the rubbing in of cold butter into the flour. I was fine until just over halfway in; the mixture resembled it characteristic 'breadcrumb' texture, but when I continued to add butter past the 'half fat ratio', it clumped up to a doughy paste. This is what I assumed would happen, but the recipe said it should resemble breadcrumbs when all the butter had been incorporated. Despite the wrong consistency, I decided to press on, adding the sugar and eggs. At this stage, it was unlike any pastry dough I have ever seen or made. It resembled a thick cake batter, far too wet to be able to roll out. Still, I didn't want to give up on it just yet, so I placed it in the fridge for the first resting period. During this time, I did a bit of research on other people's experiences making the pastry. I found that I should've chilled everything, instead of just the butter and eggs. And I mean everything, flour, sugar, mixing bowl. Possibly if I had not missed this stage I would've been able to rub all the butter into the flour without it becoming a dough.

I left the dough in the fridge overnight (the minimum time is 3 hours), by which time it had really firmed up. Aside from needing a bit of upper-arm strength to get the rolling out started, the majority of the next few stages went smoothly. More of Heston's innovation comes out here; you line the tin with the pastry and chill for half an hour. Then you prepare the case for blind baking by covering it with greaseproof, and baking beans or preferably coins. It's a great idea, because the metal coins conduct heat much better. It's probably better to use foreign currency that you aren't likely to need again. If you have some francs hanging around from holidays past then now is the time to use them. Then you chill it again before you can blind bake it.

From my online research, I found that others experienced the pastry leaking out butter as it cooked, and some shrinkage. So halfway cooking, I removed the pastry case, and dabbed up some of the excess butter. To deal with the shrinkage, I used the back of a teaspoon to press the sides of the pastry back up against the tin. Luckily, despite my doubts, it came out as a pastry case should.

Making the filling threw up far less issues, as its just the matter of chopping the pecans and whisking everything together. But I did make a few mistakes that you and I can learn from. Make the filling in a measuring jug, so you have more control when you pour it into the pastry case. I poured from a mixing bowl and got liquid filling over the top of the case, which made it look a bit messy even after I did some damage control with a spoon.

 Finally, when it comes out of the oven, the filling will still be very liquid and now molten. Be really careful when taking it out, you might find it easiest to slide it onto a chopping board or similar from the oven shelf. The last thing you want is burnt hands and a pie on the floor in place of dessert.

Ingredients
For the pastry (makes enough for 2 pies, either freeze remainder, halve pastry ingredients or double filling to make 2 pies):
400g plain flour
1 heaped tsp salt
400g unsalted butter, chilled and diced
100g icing sugar
2 eggs
2 egg yolks

For the filling:
4 eggs
60g unsalted butter, melted
1/4 tsp salt
250g soft brown sugar
1 teaspoon vanilla extract
125ml maple syrup
190ml golden syrup
150g pecans, chopped

..............

Method
Please read above notes on the pastry making before proceeding!
Put the flour and salt in a large mixing bowl. Rub in the chilled and diced butter with your fingertips until the mixture resembles breadcrumbs. You may have to add the butter in batches, given the quantity. Stir in the icing sugar, and then the eggs and yolks. Form into a ball, clingfilm and place in the refridgerator for at least 3 hours. As my dough was so soft, I just clingfilmed the bowl instead.

Grease a 9" pie dish. Dust a sheet of greaseproof paper with flour. Take about 2/3 of the dough out, and place on the greaseproof paper. Dust this with more flour, place another sheet of baking paper on top and roll out to 5mm thickness. Line the dish with the pastry, trimming off the overhang. Chill for at least 30 minutes.

Take another sheet of greaseproof, scrunch it up, smooth it out again, and put on top of the pastry. Weigh it down with baking beans or coins. Return to the fridge, and leave it for another 30 minutes. Preheat the oven to 150C. Bake for 25-30 minutes. Halfway through the cooking time, take it out of the oven and remove the greaseproof and coins/baking beans. Soak up any excess butter with kitchen roll. If needed, use the back of a teaspoon to push the sides of the pastry back up against the tin. Remove and allow to cool once the blind baking time is done.

Turn the oven up to 180C. In a measuring jug, whisk together the eggs, then mix in the remaining ingredients. Pour into the prepared pastry case. Don't overfill it - you may have a little extra filling left over. Bake for 45 minutes. It will need to cool down before it is sliceable. Serve with vanilla ice cream  (my preference), or cream.

Update- 19/10/14

I revisited this recipe, but wanted to use a different pastry recipe- something simpler and less rich- the pie I made back in 2012 was delicious, but I felt a plainer crust would work better with the sticky sweet filling. I made a half quantity* of this simple sweet shortcrust, which is less rich than the Heston pastry, and much easier to work with. I also got rid of most of the chilling stages, only resting the dough between making it and using it to line the pie. I still used the same times and temperatures for the blind baking and baking as in the recipe above. I added in a step of using some foil to protect the rim of the pie crust, as it gets very dark very quickly.

Overall, I think I preferred this pie crust for a pecan pie- it allowed the richness of the filling to shine through, but was still had a wonderful short texture, and buttery flavour. It also makes making pecan pie so much easier and faster, without resorting to a pre-made pastry shell.

* a half quantity still made enough for two pies, so either quarter the link recipe, or make enough for more pies, freezing what you don't immediately use for a later date.

Tuesday, 21 February 2012

Better Breakfasts: American Pancakes, Crispy Bacon and Maple Syrup

During the week, I'm not a breakfast person. I'm well aware that there is nothing to be gained from skipping the first (and most important) meal of the day. But my love of sleep is basically on par with my love of eating, so if I can sacrifice morning routine for 10 minutes extra in bed, then the snooze button will often win. For me, there's no joy in half consciously spooning cereal from bowl to mouth anyway.
On a day off or a weekend, I love a good breakfast, and not just the alcohol sponging full English, although that ranks pretty highly. I love this US answer to the fry up: super thin and crispy bacon, thick spongy pancakes all brought together with a drenching of warmed maple syrup.


As there are only 3 elements to this, it's important to get them right. The bacon must be streaky, and grilled or fried until it is snappable. I'm not usually a lover of cremated bacon, with back bacon I like it cooked until it is touching upon crispy, and any element of flabbiness is removed, but no more. For this, well done is the only way. The pancakes should be freshly made and the syrup warmed. I'd definitely recommend drafting someone into lend a hand. Nothing is difficult, it just all requires last minute attention. They can look after the bacon while you get on with the pancakes or vice-versa. Anyway, unless you want to eat a huge pile of pancakes, the smallest batch of pancake batter makes enough for at least two people. I used the recipe for American pancakes from the BBC Food website. It works very well, although I feel both obliged and reticent to tell the reader that the suggested 4-6 people it served easily fed two of us.


Here's Agent Dale Cooper to explain just why this works so well.


Now all you need is coffee- black- and you're all set.

Friday, 16 September 2011

Baking Powder Biscuits

Biscuits as in the USA meaning, not the British sweet things to have with tea. Have them with an American-style breakfast, or with a gumbo, as I did. Leslie Forbes suggests serving them in place of cornbread, or using the dough as a crust for chicken or beef stews.


Ingredients
350 grams plain white flour
4 tsps baking powder
1/2 tsp salt
1 tbsp sugar
4 1/2 tsp butter or shortening
125 ml milk

Method
Preheat oven to 220 degrees, and line a baking sheet. Sift the flour and baking powder into a bowl, stir in the salt and sugar. With a knife, cut the butter into the flour until it resembles breadcrumbs. Stir the milk in, a little at a time, until it is just sticking together. Pat into a ball and roll out on a floured surface to a thickness of about 1.5 cm. Cut into 5cm rounds with a pastry cutter. Transfer to a baking sheet and bake for about 15 minutes until pale gold and risen. Eat them hot with butter.

Gumbo z'Herbes

oI don't know too much about Louisianian cookery, although it's on my ever-growing list of cuisines to explore. The Gumbo Pages is a wonderful source, it's saved me from buying yet more recipe books and my bookshelves from completely collapsing under the weight of said books. Remarkable Feasts by Leslie Forbes is the only book I own with Cajun/Creole recipes, and the recipe below is basically the same as hers, with a few small differences. I think this lovely book is sadly out of print, so if you see it, buy it.

There are many, many types of gumbo, probably each having their own personal recipe, so the search for the 'proper' way to make one is fruitless. What unites this type of gumbo is the roux, the oil and flour thickener that each gumbo starts with. Unlike the French roux that you would use to make a bechemal sauce, oil or bacon fat can be used instead of butter, and you cook the flour in the hot fat until it is browned. Watch out for burns, not for nothing is it known as Cajun Napalm.

Looking at various recipes online, it seems the inclusion of a ham hock is common in a gumbo z'herbes. Leslie Forbes uses pickled pork instead, which you make yourself by macerating spare ribs in cider vinegar and spices for 24 hours. If you don't have the time or the inclination to start your cooking a day in advance, I'd advise adding a ham hock to the soup at the time that you would have added the pork.

Ingredients
For the pickled pork:
500 grams spare ribs
2-3 tbsps black peppercorns, crushed
2 tbsps sea salt
1 dried bay leaf, crumbled
2 dried chillies, crumbled
Cider vinegar, to cover

Put the ribs and spices in a non-reactive container (i.e. glass or plastic), and cover with the vinegar. Cover, and leave for at least 24 and up to 48 hours in the fridge.

For the soup:
3 tbsp clarified butter, oil or bacon fat
3 tbsp flour
1 small onion, chopped
2 cloves garlic, chopped
1 green pepper, deseeded and chopped
250 grams spinach, trimmed
250 grams spring greens/ kale, trimmed
1 pint chicken stock
500 grams pickled pork, rinsed and patted dry
1 clove
1 tsp allspice berries
2 tsp cayenne
Freshly grated nutmeg, salt and pepper, to finish

In a large pot heat the butter, oil or fat. Add the flour and cook until lightly browned, stirring all the time. Add the onion, garlic and pepper and cook until they are softened and coated in the floury mixture. Add the spinach and greens, and cook for 10 minutes with the lid on until they have wilted down. Puree the mixture- easier with a free-standing blender or food processor, but less washing with a hand held blender. Return the gloriously green mixture to pan (if using blender or food processor) and add the pickled pork, clove, cayenne and allspice. Simmer for at least an hour until the meat can be removed from the bone with minimal persuasion. Serve over rice, or with buttered biscuits.